
NEUROPTIMAL® NEUROFEEDBACK · HOME RENTAL GUIDE
Setting up your NeurOptimal® Neurofeedback at home
Your kit has arrived. Welcome. This page walks you through it one gentle step at a time, from opening the box to your first session. There is nothing technical to learn, and we are always a phone call away.
Led by Bita, senior occupational therapist · For clients renting a home system

FREE GUIDES
Free guide: how to set up NeurOptimal® Neurofeedback
Prefer paper, or want it on the tablet beside you? Download our short guide, or the official setup guide from the makers. Both are free, and they open in a new tab.
FROM MENTAL HEALTH OT AUSTRALIA
NeurOptimal® Neurofeedback Home Rental: Setup & User Guide
Our six-page guide for your kit: what’s in the box, connecting everything, sensors, running a session, looking after the kit and sending it back.
Download our guide (PDF)OFFICIAL · ZENGAR INSTITUTE
Free guide: how to set up NeurOptimal® Neurofeedback
The official Getting Started Manual: connecting the hardware, Wi-Fi, applying the sensors, running a session, removing and caring for the sensors. 20 pages, with photos.
The official guide is the maker’s own, so we link to it rather than copy it. Prefer to read it on screen? Open the online version.
BEFORE YOU BEGIN
Take it slowly. It is simpler than it looks.
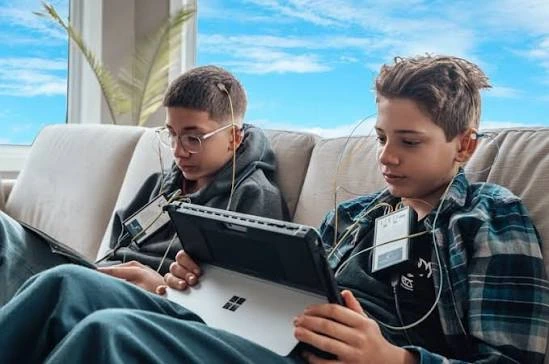
Small sensors sit gently on the scalp and ears. They only listen to your brain’s own electrical activity, and nothing is sent into the brain. You then rest while music plays. Every so often the music pauses for a moment, and those tiny pauses are the feedback. There is nothing to do, learn or think about. NeurOptimal® Neurofeedback is brain training, not a medical treatment.
The first time, allow a little extra time to put the sensors on. It feels fiddly at first, and then quickly becomes easy.
A one-minute introduction. Official video from NeurOptimal® Neurofeedback (Zengar Institute). Watch on YouTube
What is it, in about three minutes? Official video from NeurOptimal® Neurofeedback (Zengar Institute). Watch on YouTube
Official pages: Getting Started Manual (online) · Help for renters · Neurofeedback at home
WHAT’S IN YOUR KIT
Let’s check everything arrived
Unpack gently and lay everything out. If anything is missing or damaged, please call us or contact us straight away and we will sort it out.
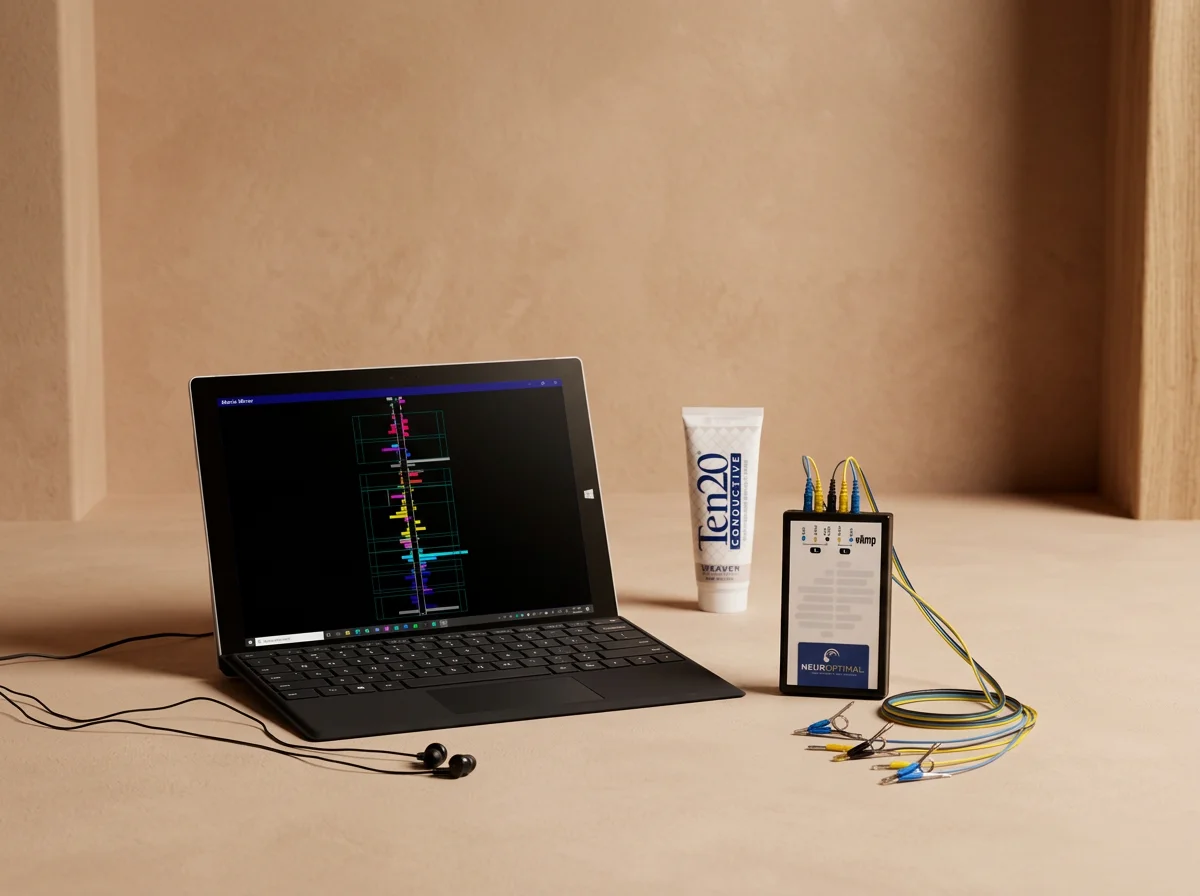
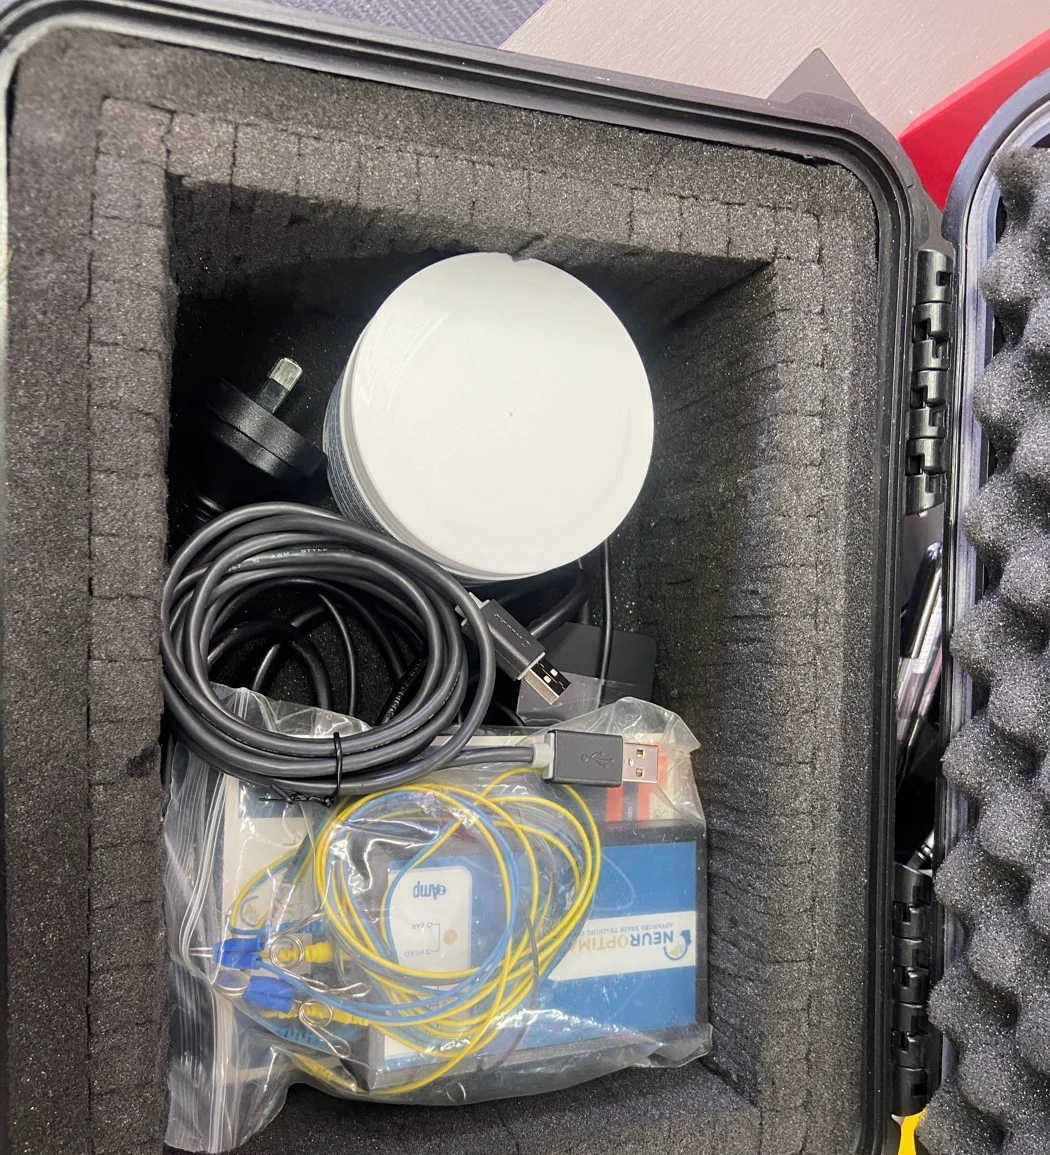
Photo: the main parts of the system. Headphones are not included unless you ask us for a pair. Your kit also includes a spare set of sensors, a charger, a carry case and a larger tub of paste.
- Microsoft Surface Pro tablet, in its protective case
- Surface power adaptor and Australian plug
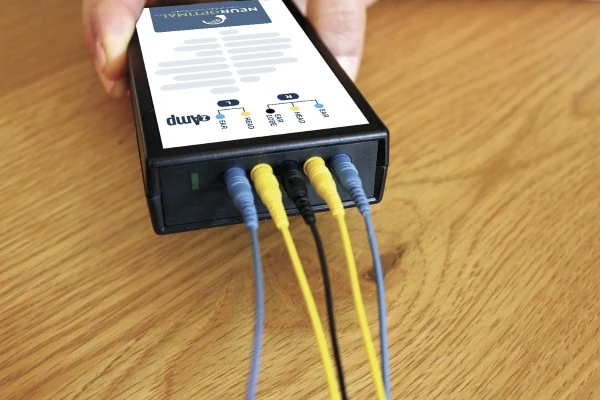
- The zAmp amplifier, with the sensor leads attached
- A spare set of sensors
- USB cable for the zAmp (about 4.5 metres, or 15 feet)
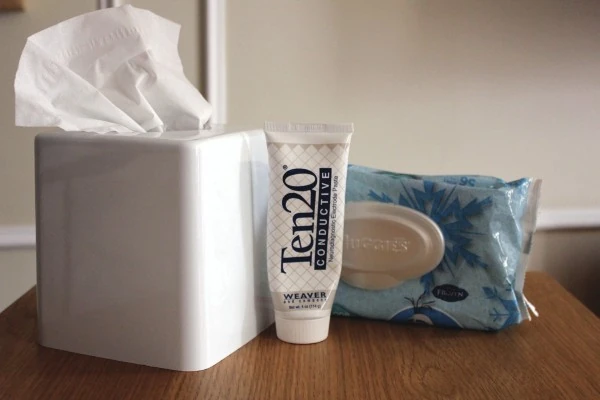
- Ten20 conductive paste, in a large tub
- Paste-remover wipes
- The hard carry case. Your return postage envelope is inside it.
Please have these handy
- Tissues or baby wipes (please avoid alcohol wipes)
- Your own headphones: wired headphones or earbuds with a 3.5 mm plug. For hygiene we do not send headphones, but a pair can be included on request. Not sure what will work? call us.
- Your home Wi-Fi name and password
- A comfortable chair, sofa or recliner
- For children: a book, colouring or a quiet activity
We send your kit by Express Post to your door, at our cost.
BEFORE YOUR FIRST SESSION
Helpful free resources
These are the official free guides and pages from the makers of NeurOptimal® Neurofeedback. Have a look before your first session. They all open in a new tab.
Printable guides (PDF)
- Session cheat sheet: one page showing how to start a session
- Rental user checklist: a quick checklist for renting families
- Self-help guide: simple steps if something is not working
- My journal checklist and journal tracker: a gentle way to notice small changes
Pages to read or watch
- Online Getting Started Manual: setup, sensors and sessions, with videos
- Neurofeedback for kids: why sessions feel simple and gentle for children
- How it differs from other neurofeedback: a plain comparison from the makers
- Neurofeedback at home: what to expect from your first session at home, and how a whole household can use one system
- Video tutorials: short how-to videos
- Help for renters: documents and videos for home users
- Technical Support FAQs and tech tips
OFFICIAL APP
My NeurOptimal® Companion
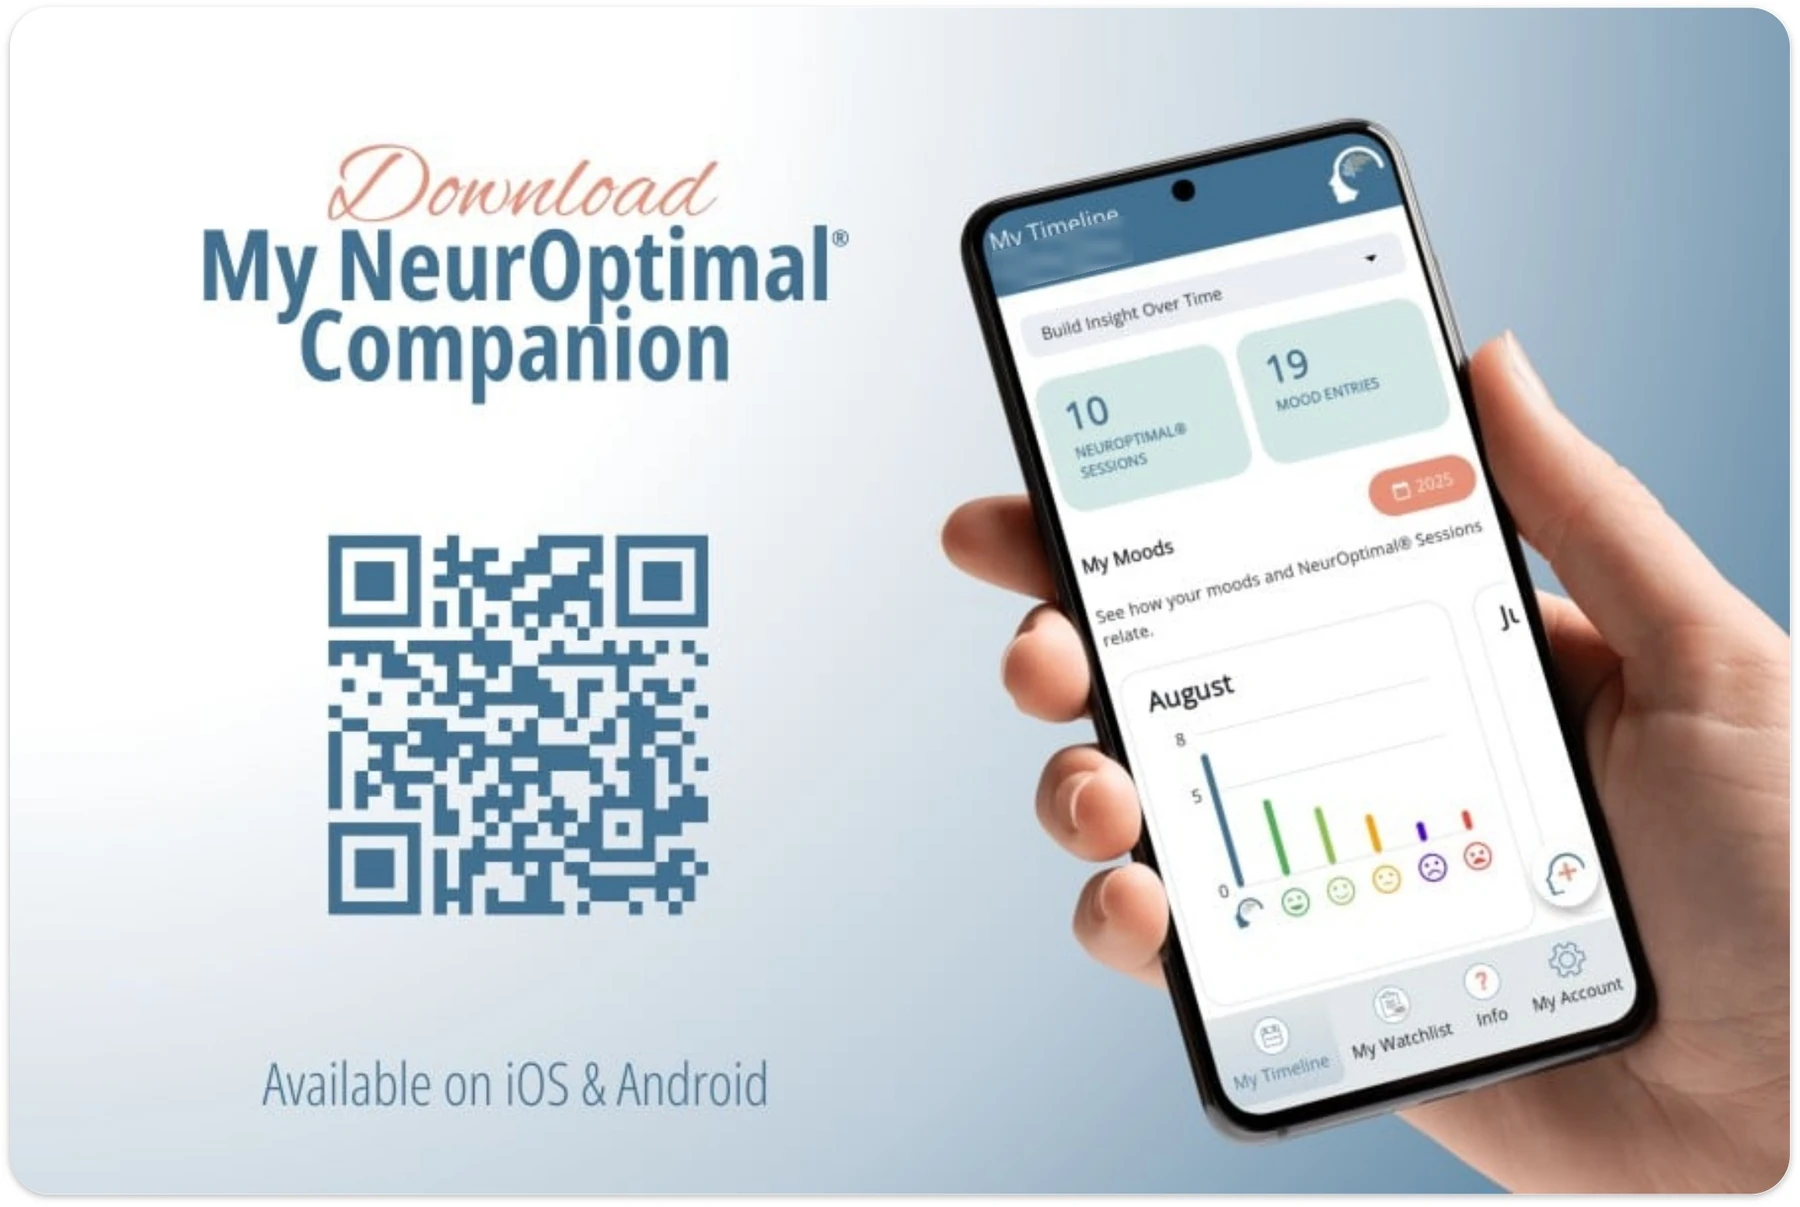
A diary app from the makers of NeurOptimal® Neurofeedback. You can log session dates and notes, note how you are feeling, see monthly summaries and trends, and create a PDF report to share with Bita. Your reports stay private on your own device. It does not run sessions or read data from your Surface Pro, so you add your notes yourself.
You do not need to download or sign in to any software. NeurOptimal® Neurofeedback is already set up on your Surface Pro. Your login details are given to you separately by Bita.
SET THE SCENE
A calm start
- Choose a quiet space. Somewhere calm with a comfortable seat, where you will not be disturbed.
- Charge everything. Charge the Surface Pro fully and keep the charger nearby.
- Get comfortable. A sofa, armchair or recliner is ideal. Tidy long hair back so it is easy to part.
- Gather your bits. Paste, tissues or wipes, your own headphones and your Wi-Fi password within reach.
STEP BY STEP
From the box to your first session
Seven small steps, written in plain words from the maker’s official manual. You can come back to this page any time.
SOFTWARE & APP
Your software and the companion app
The NeurOptimal® Neurofeedback software is already installed on your Surface Pro, so there is nothing to install to run a session. The free My NeurOptimal® Companion app is optional. It is a diary for logging sessions and how you feel, on your phone.
Printable version: official Getting Started manual (PDF)
Unpack and charge
Lay out everything from your kit and check it against the list above. Plug in the charger and let the Surface Pro charge. Please do not change its language, date or time settings, and please do not install any other programs, as that can stop the software working.
Connect the zAmp and turn on
- Clip the zAmp to a towel or the back of your shirt, with the USB cable hanging freely.
- Push the USB cable into the zAmp, then into the USB port on the Surface Pro.
- Match each coloured lead to the same colour on the zAmp. The right side has three leads and the left side has two.
- Plug in your own wired headphones or earbuds (3.5 mm plug). Not sure what will work? call us.
- Press the power button in the top-right corner of the Surface Pro, as in the official manual, and give it a minute to start. Please do not tap repeatedly, as it may freeze. Your login details are given to you separately by Bita.
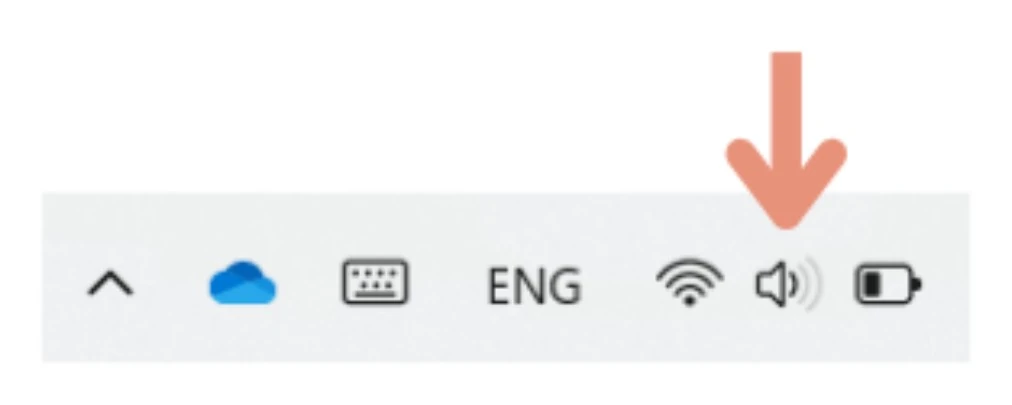
- The first time, join your Wi-Fi: tap the Wi-Fi symbol at the bottom right of the screen, choose your network, enter the password and wait for “Connected”.
- Tap the NeurOptimal® Neurofeedback icon on the bar at the bottom of the screen and wait for it to load.
The system needs to go online at least once a week to check its licence, so staying on Wi-Fi is best. It also lets Windows updates run.
Connecting the hardware
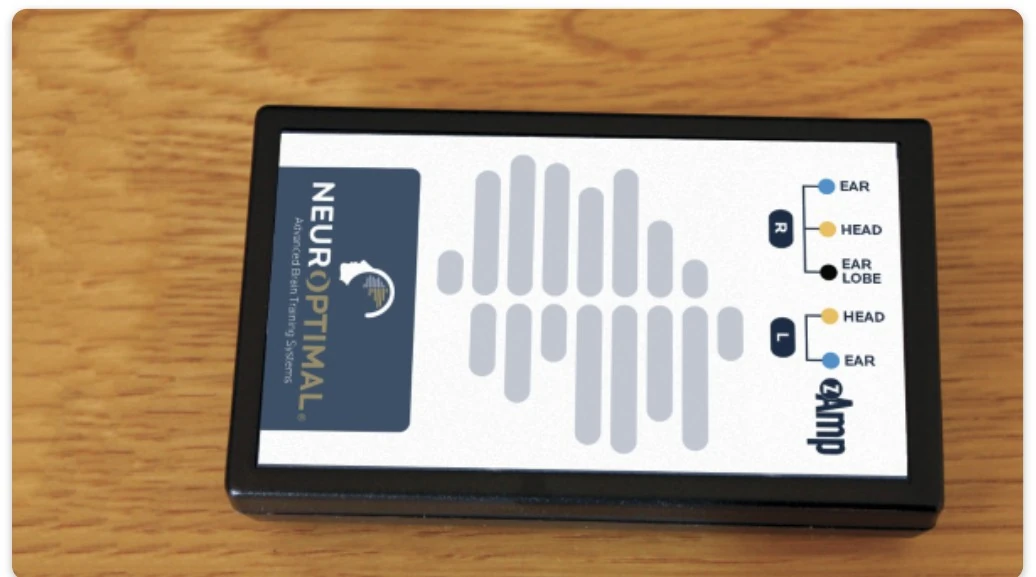
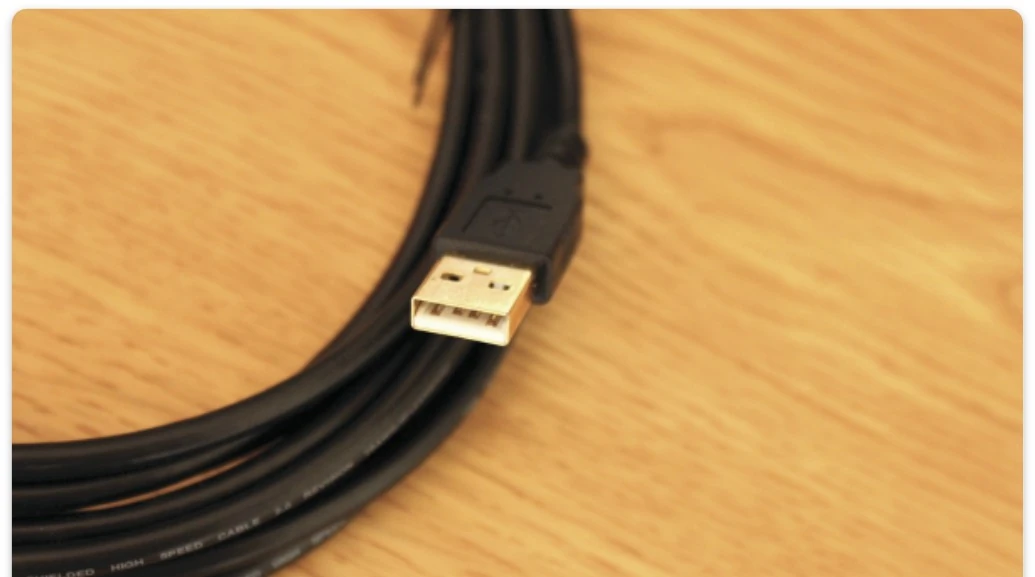
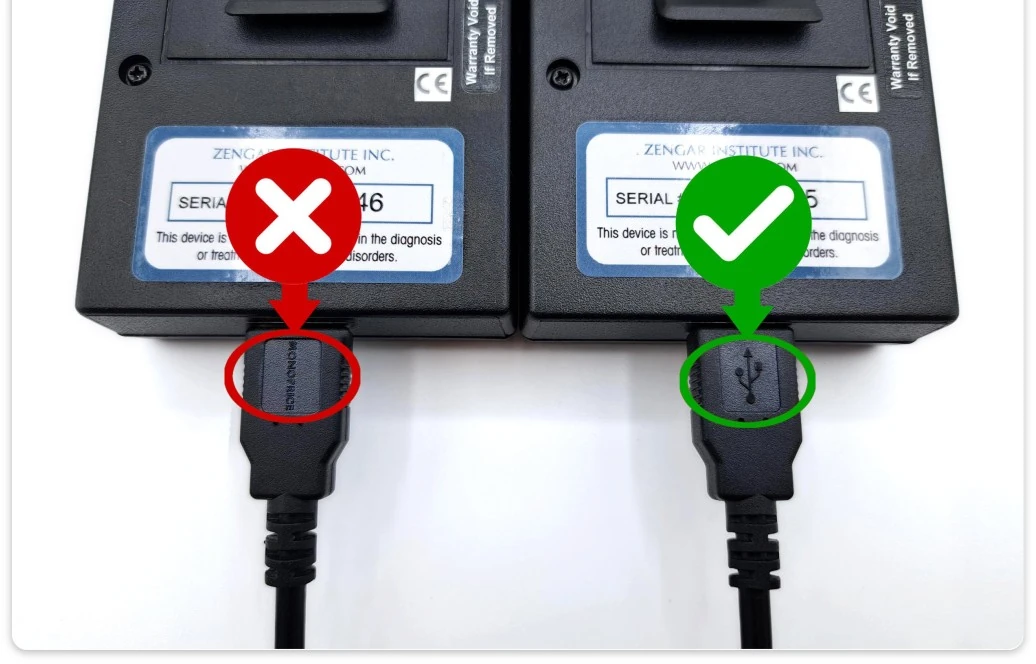
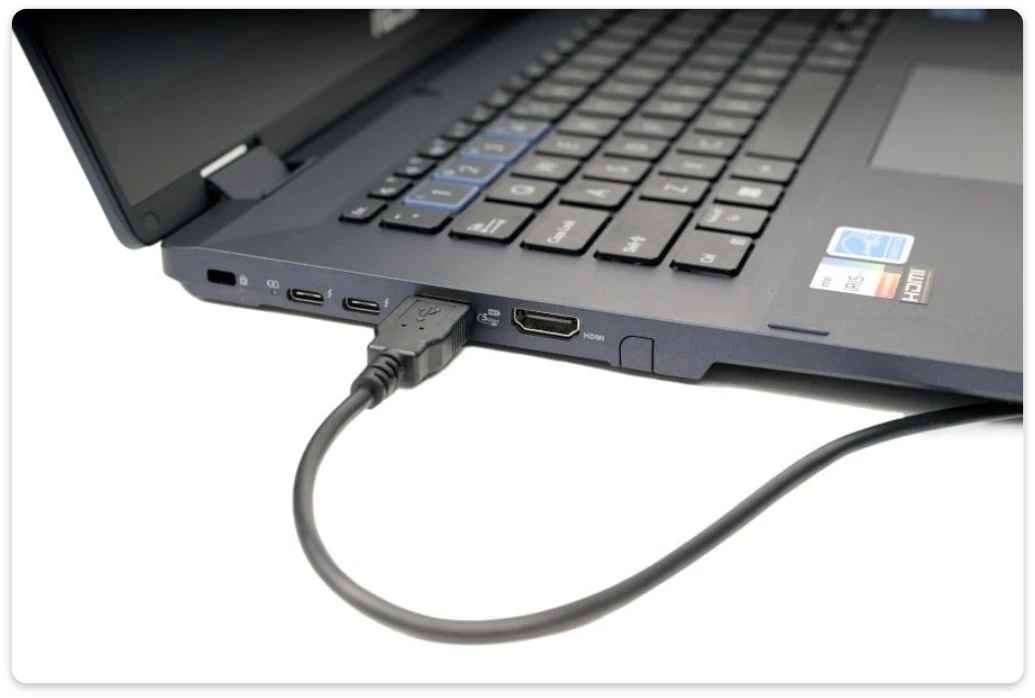
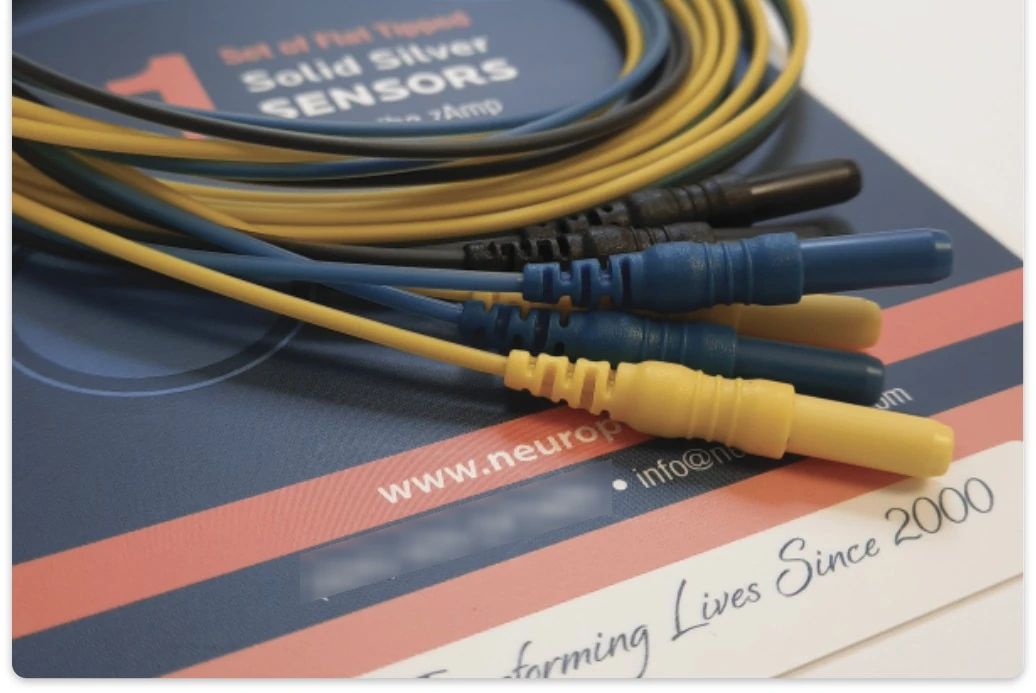
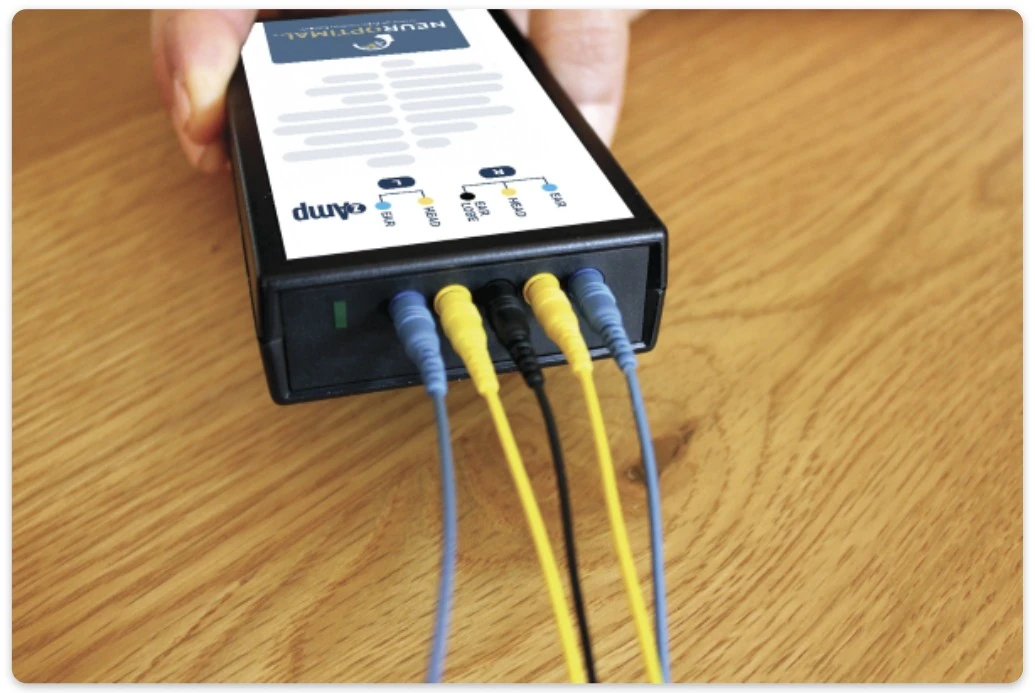
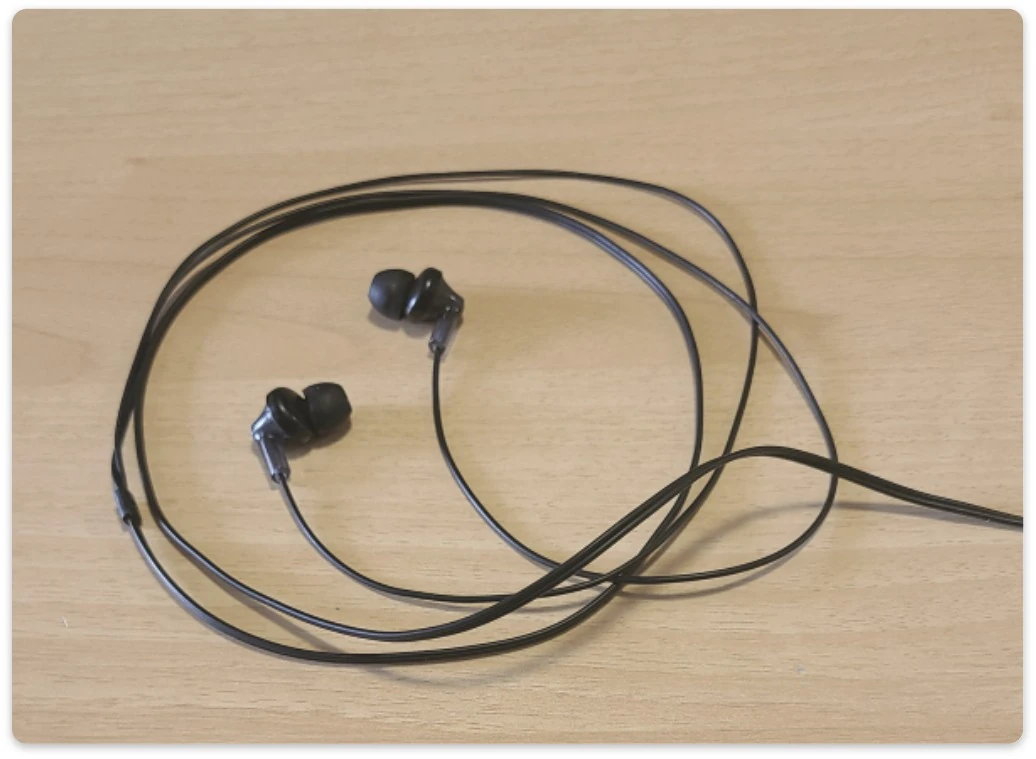
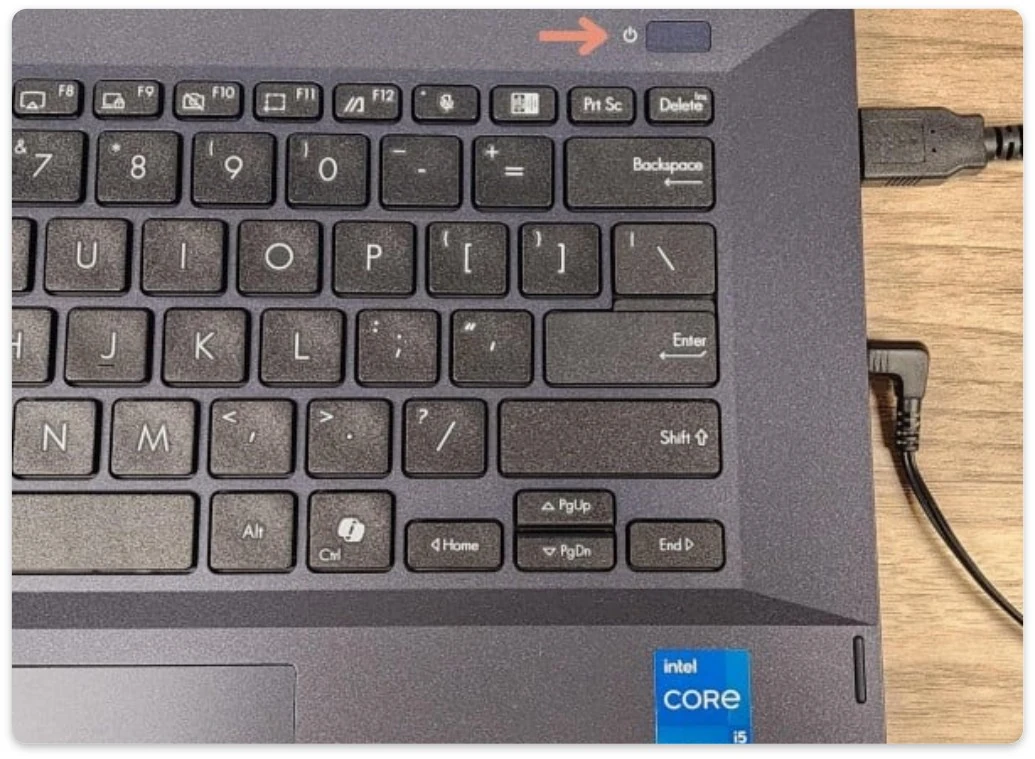
Our notes: the manual’s photos show a laptop, and your Surface Pro looks different, but the steps are the same. Headphones are not included in your rental, so please bring your own wired headphones or earbuds.
Images and step instructions: NeurOptimal® Getting Started Manual, © Zengar Institute Inc. All rights reserved. Used with acknowledgement. Official version: https://neuroptimal.com/getting-started-manual/ · Official PDF
Connecting to Wi-Fi

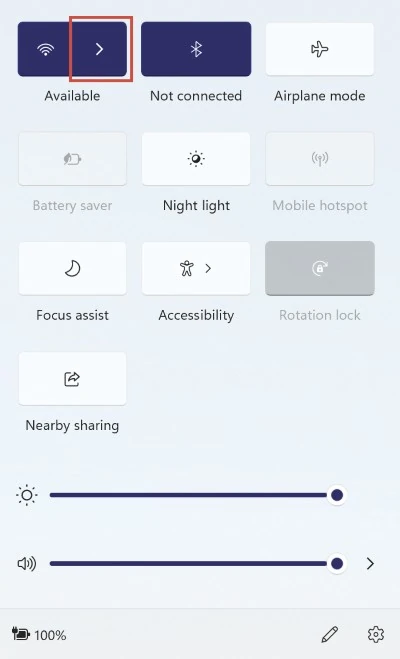
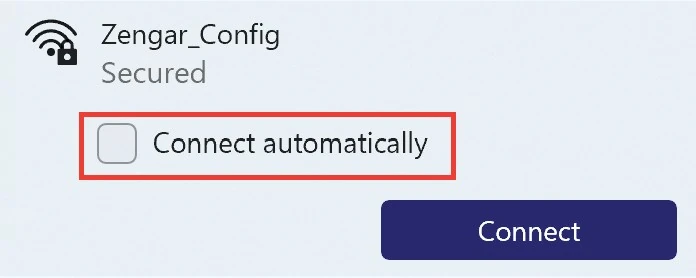
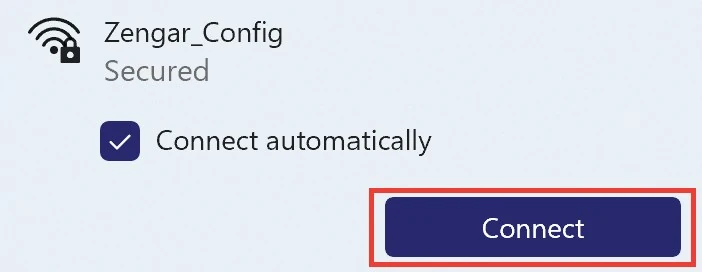
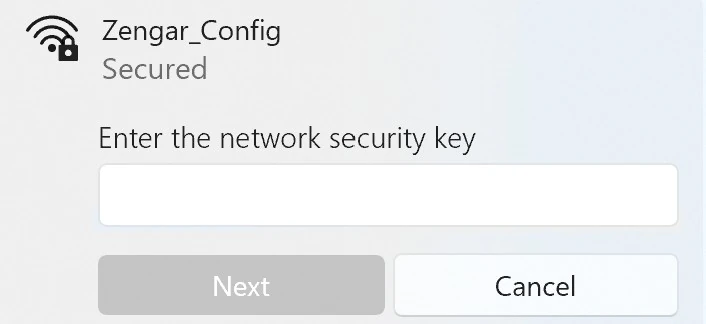
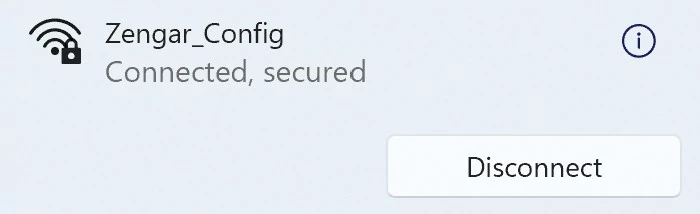
Our note: the screens show the manual’s example network name. Choose your own network from the list.
Images and step instructions: NeurOptimal® Getting Started Manual, © Zengar Institute Inc. All rights reserved. Used with acknowledgement. Official version: https://neuroptimal.com/getting-started-manual/ · Official PDF
Launching NeurOptimal®

Images and step instructions: NeurOptimal® Getting Started Manual, © Zengar Institute Inc. All rights reserved. Used with acknowledgement. Official version: https://neuroptimal.com/getting-started-manual/ · Official PDF
Opening the program (under 2 minutes). Official video from NeurOptimal® Neurofeedback (Zengar Institute). Watch on YouTube
Meet the Vault
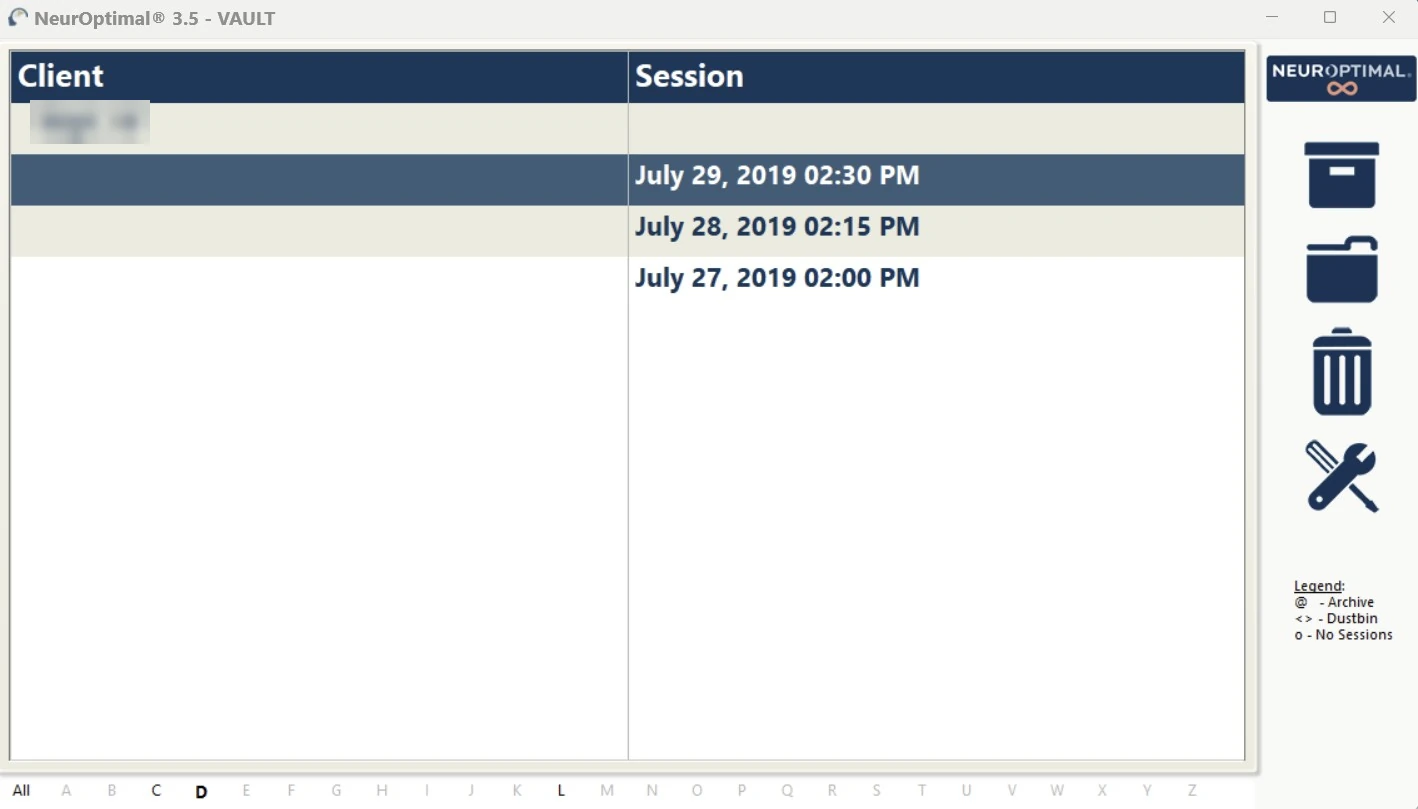
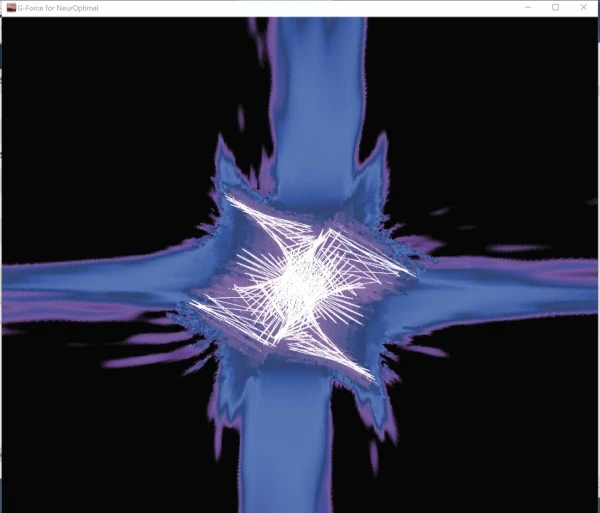
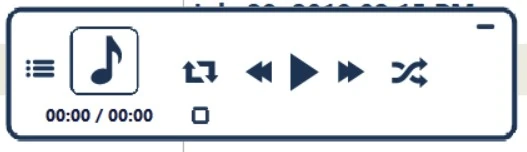
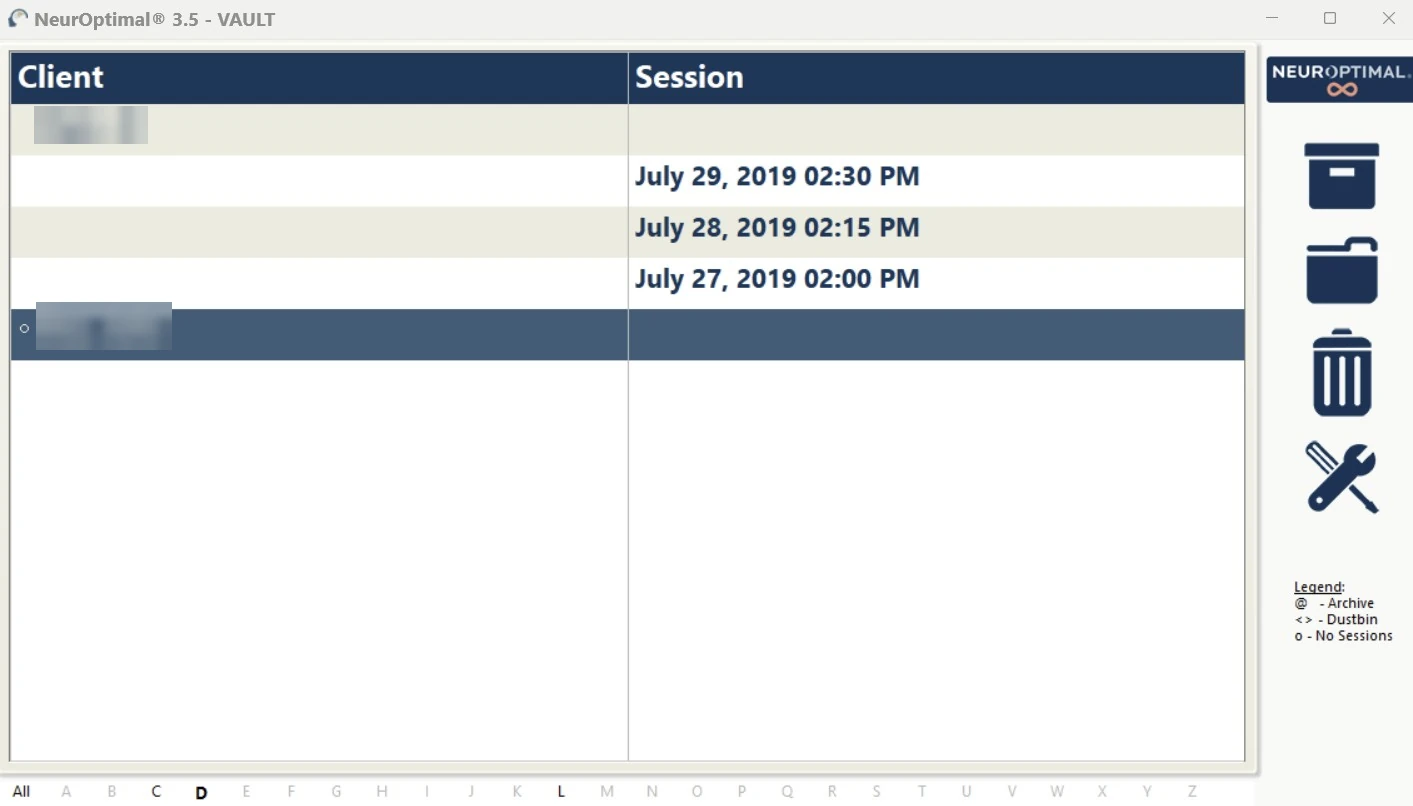
When the program opens you will see the Vault. It is the control centre when no session is running. You will also see the music controls (the NeurOptimal® Media Player) and a colourful “G-Force” visuals window, which is for watching on a second screen if you have one. You only need the Vault.
The four main windows
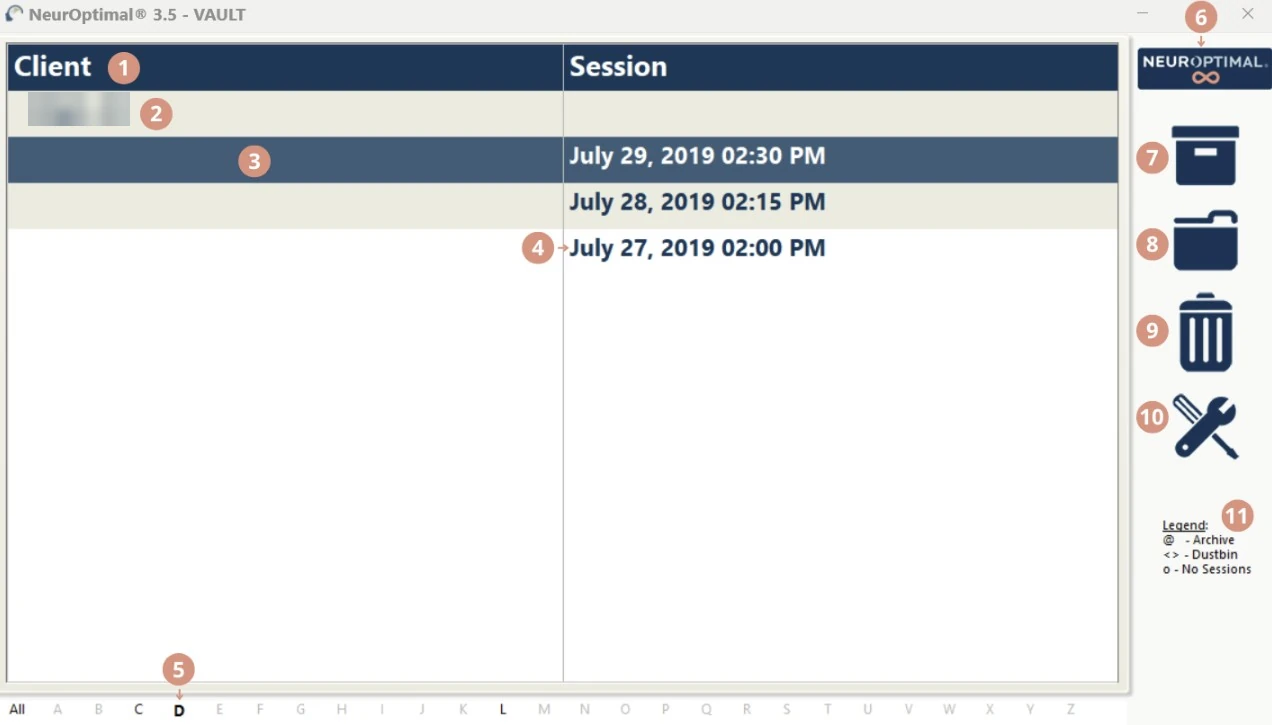
Images and step instructions: NeurOptimal® Getting Started Manual, © Zengar Institute Inc. All rights reserved. Used with acknowledgement. Official version: https://neuroptimal.com/getting-started-manual/ · Official PDF
Place the sensors
This is the one part that takes a little practice. See “Where the sensors go” just after these steps. Use plenty of paste, the more the better, like a generous ice-cream scoop or “snow cone”. Sensors must sit on the scalp, not on the hair. Clip the zAmp to your shirt or the back of the chair and let the leads rest over your shoulders. Then:
- Paste first. Put a generous scoop on each sensor, and keep one finger on the back of the sensor to support it.
- Right side first. Clip the blue clip onto the top of the right ear, pressing until a little paste oozes out. Clip the black clip onto the right earlobe. Earrings can stay in, just keep paste off them.
- Find the spot halfway between the top of your ear and the top of your head. Feel for a small bump with a dip just above it. The dip is your spot. If you cannot find it, halfway is fine.
- Part the hair so you can see the scalp, then press the yellow cup firmly onto the scalp. If it feels cool, it is touching skin.
- Left side. Clip the other blue clip onto the top of the left ear, then press the other yellow cup on the matching spot.
You do not need to be exact. Being close is enough.
Applying the sensors, step by step
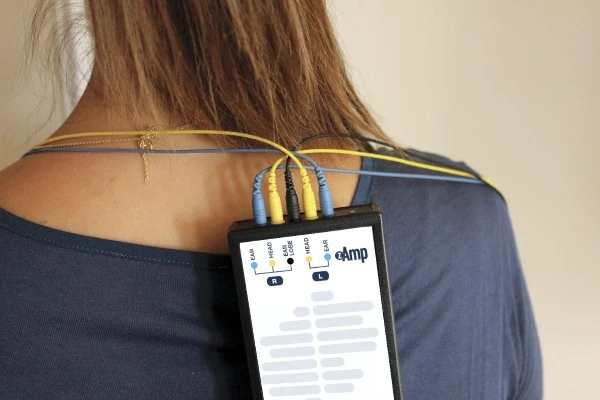
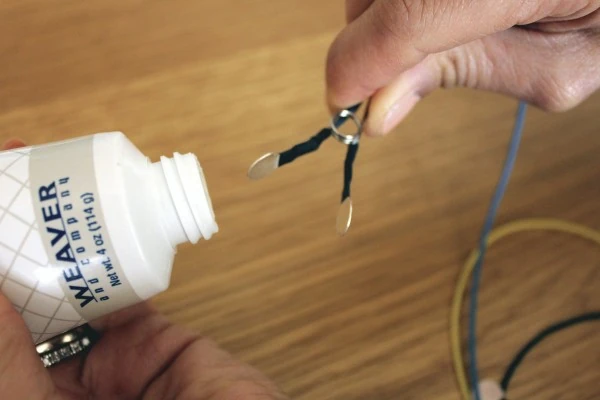
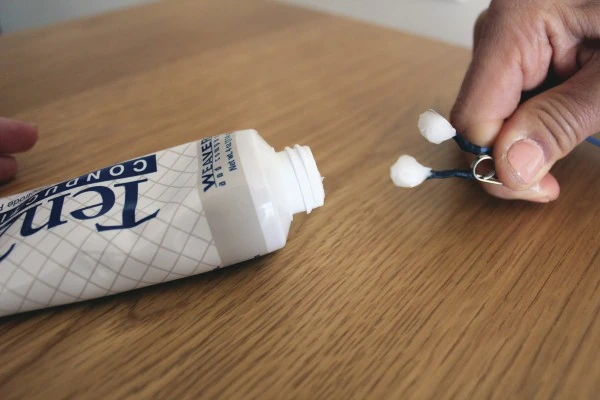
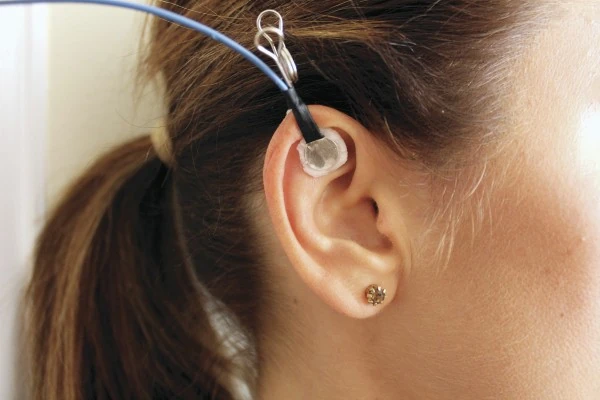
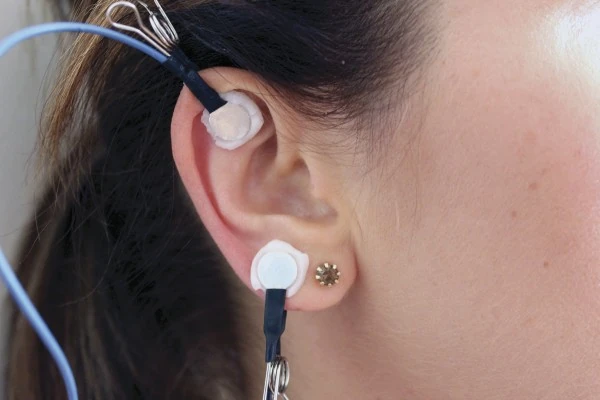
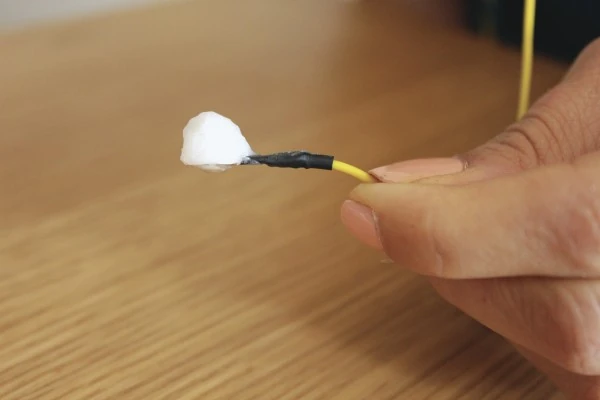
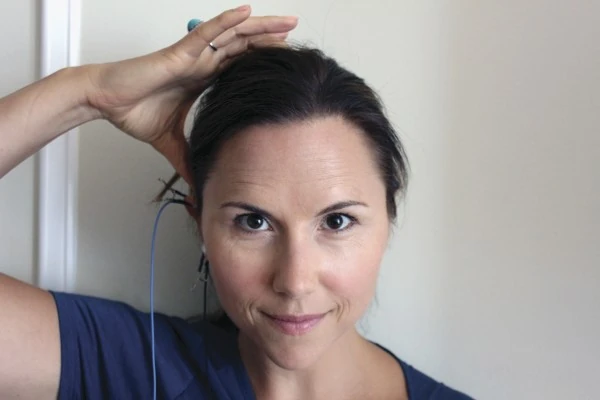
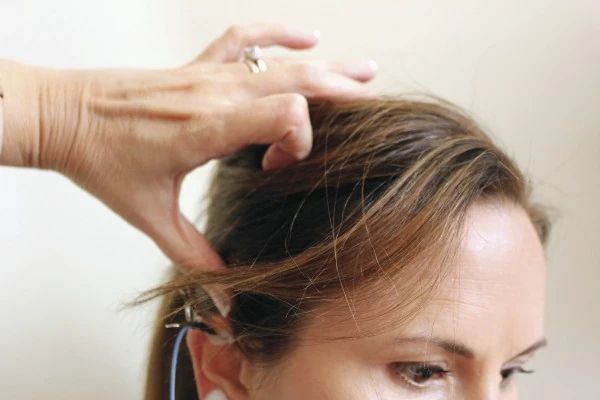
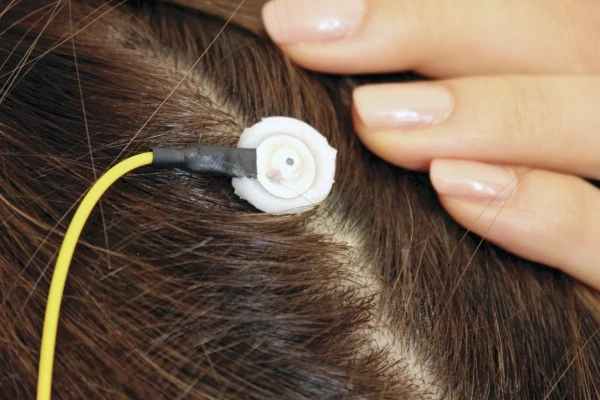
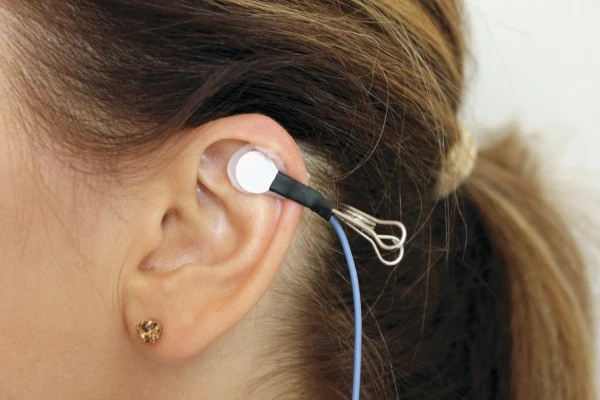
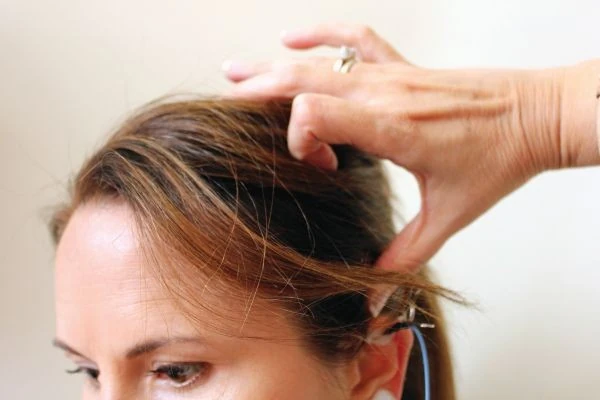
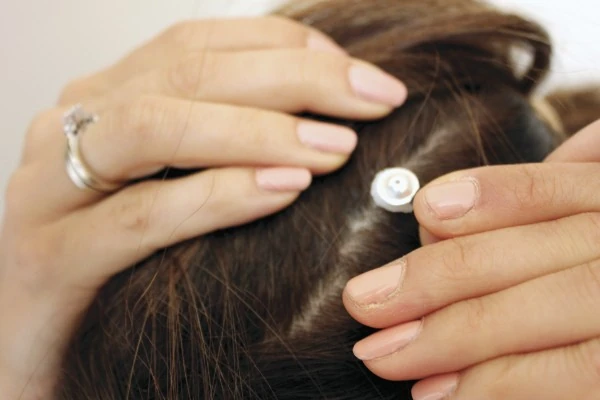
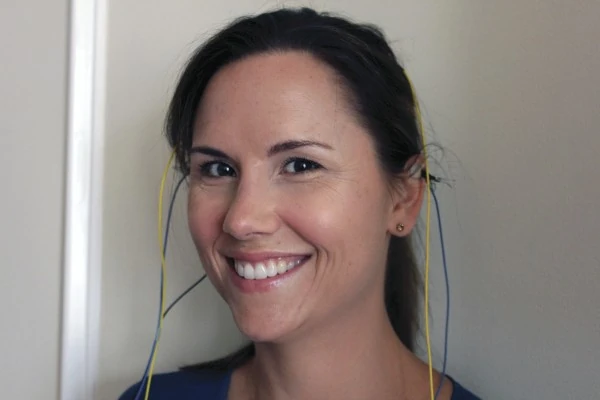
Images and step instructions: NeurOptimal® Getting Started Manual, © Zengar Institute Inc. All rights reserved. Used with acknowledgement. Official version: https://neuroptimal.com/getting-started-manual/ · Official PDF
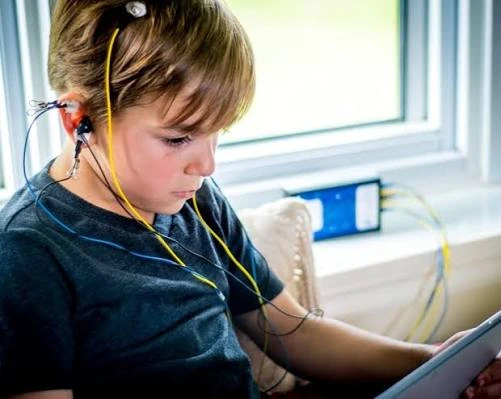
A step-by-step demonstration of putting the sensors on yourself (about 4 minutes). Official video from NeurOptimal® Neurofeedback (Zengar Institute). Watch on YouTube
Start the session
Put on your headphones and make sure the sound is on. The feedback comes through the music. Then:
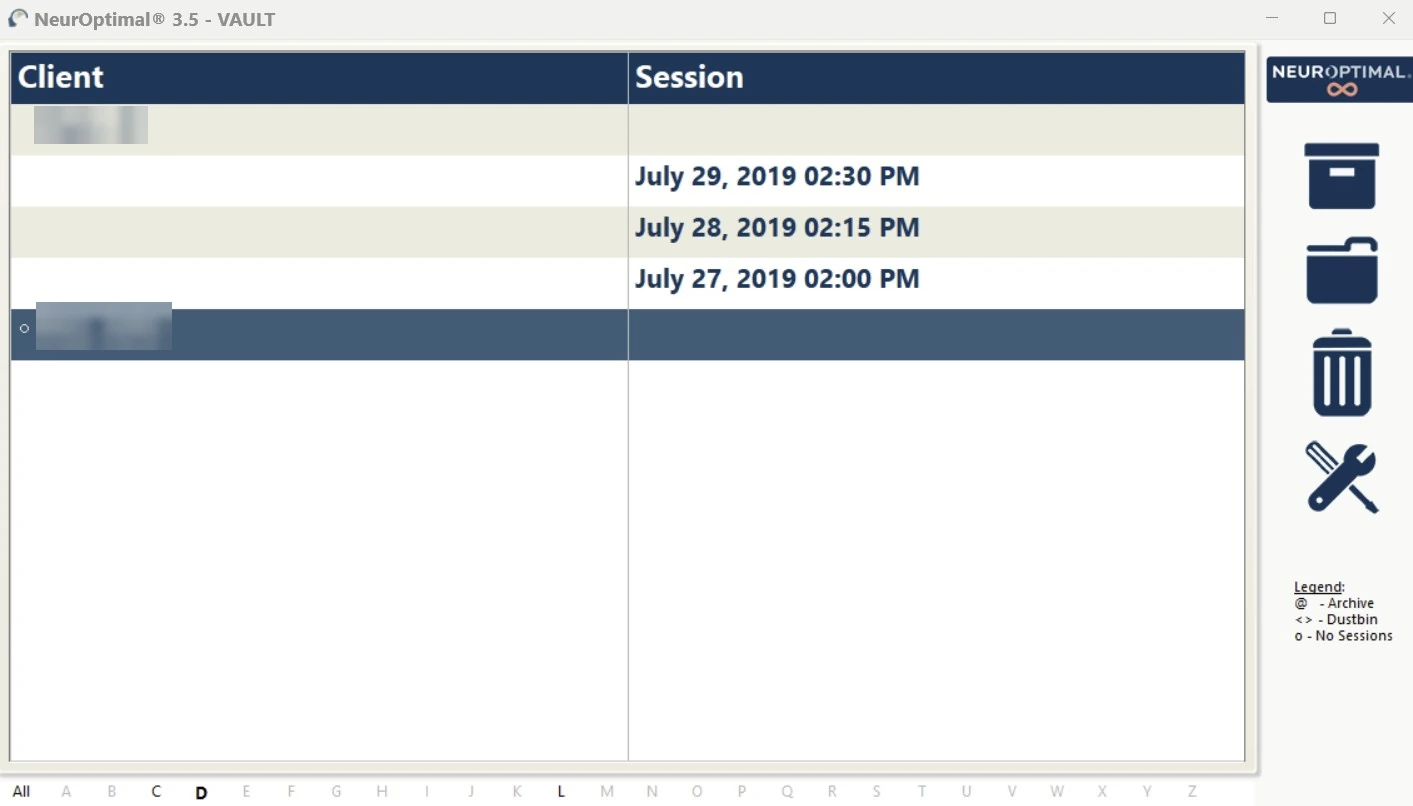
- First time: touch and hold the word “Client” at the top and choose Add a client, or simply double-tap “Client”. Fill in name, date of birth and gender.
- Next times: people are listed by surname. Tap the first letter of your surname in the alphabet tabs at the bottom, then scroll to your name.
- Double-tap the client’s name to start the session.
Navigating NeurOptimal®
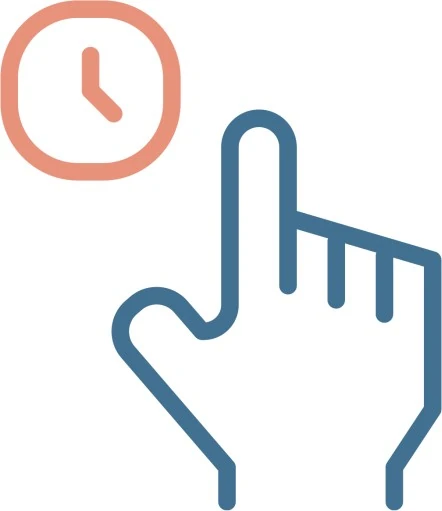
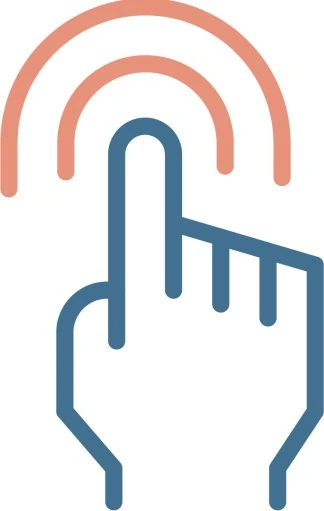
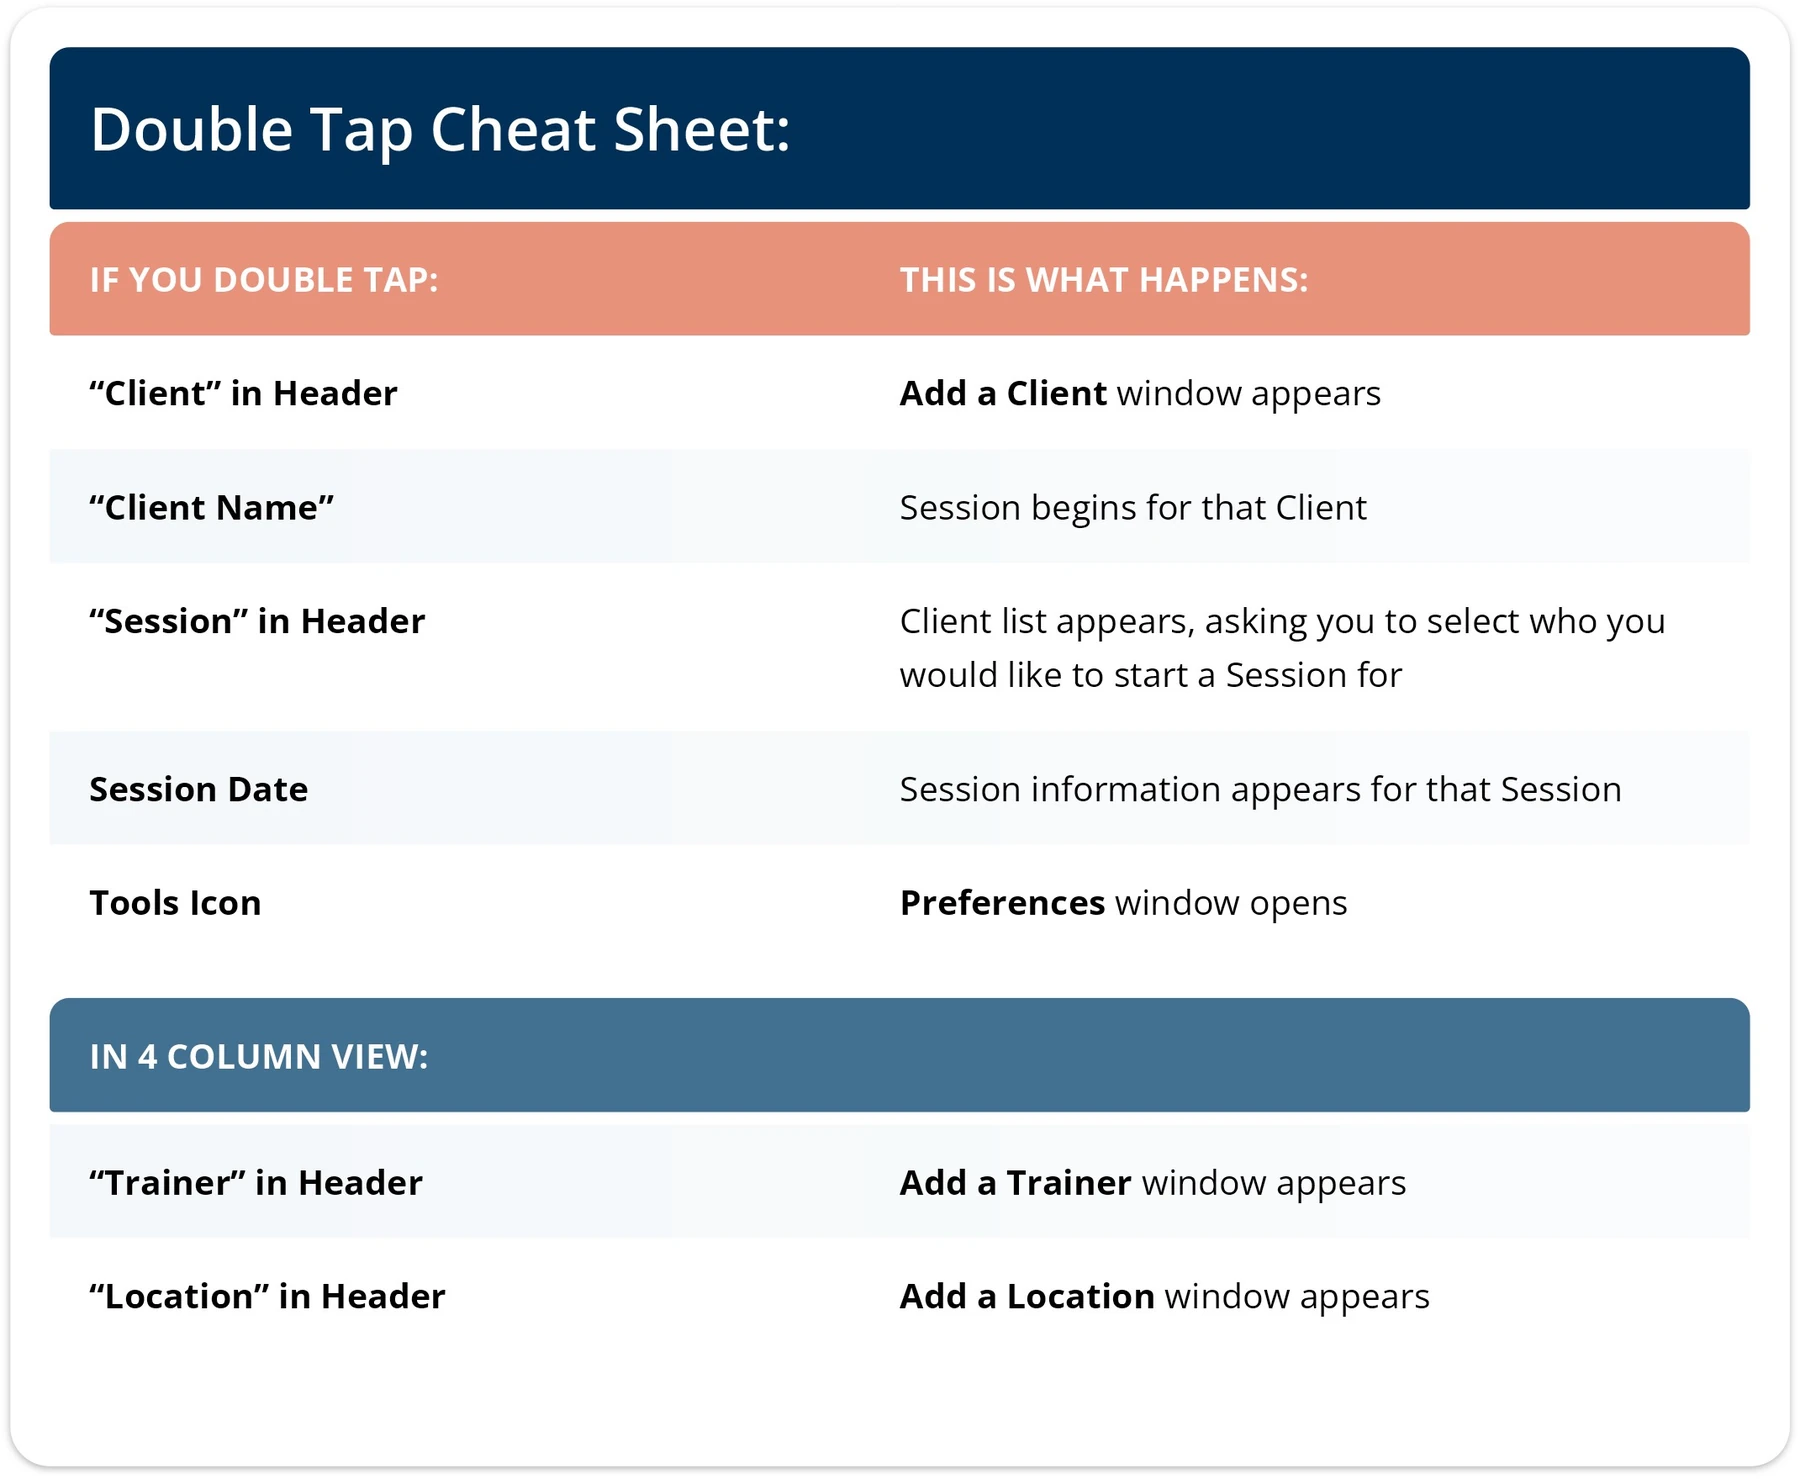
Images and step instructions: NeurOptimal® Getting Started Manual, © Zengar Institute Inc. All rights reserved. Used with acknowledgement. Official version: https://neuroptimal.com/getting-started-manual/ · Official PDF
Starting a session
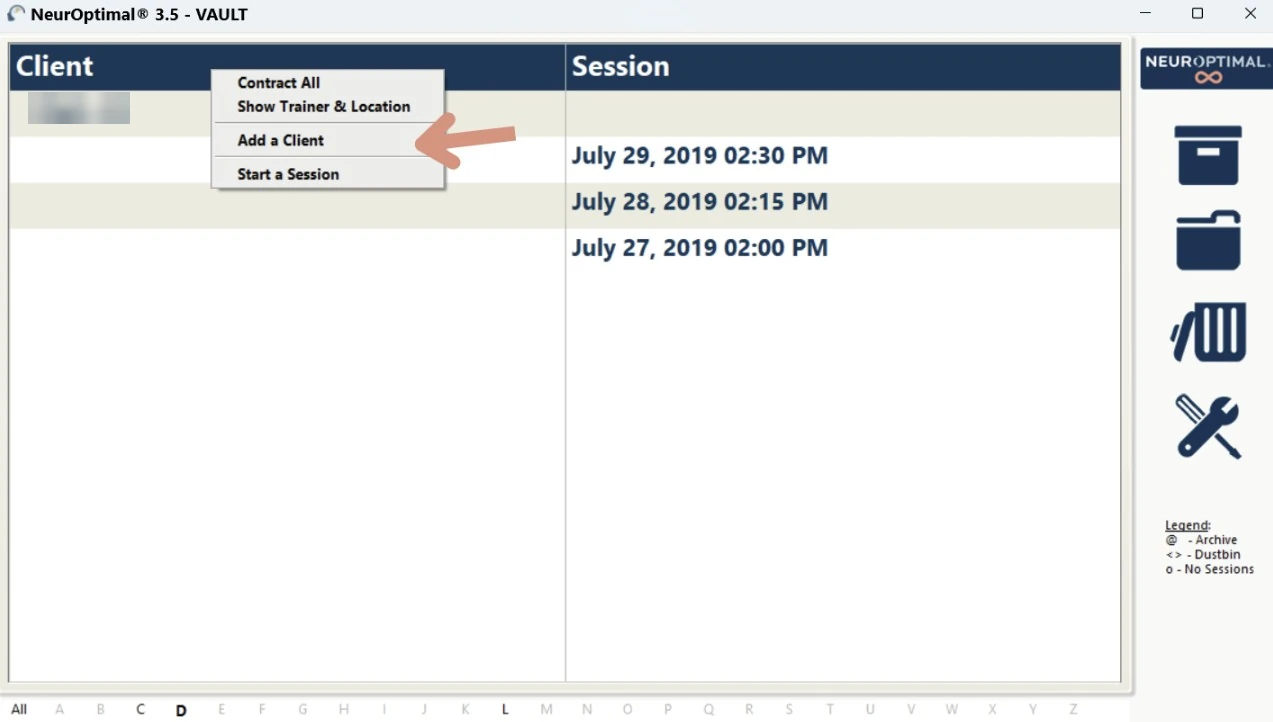
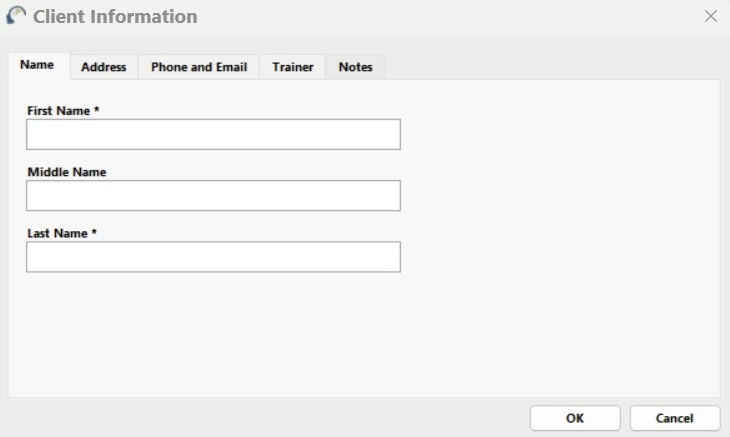
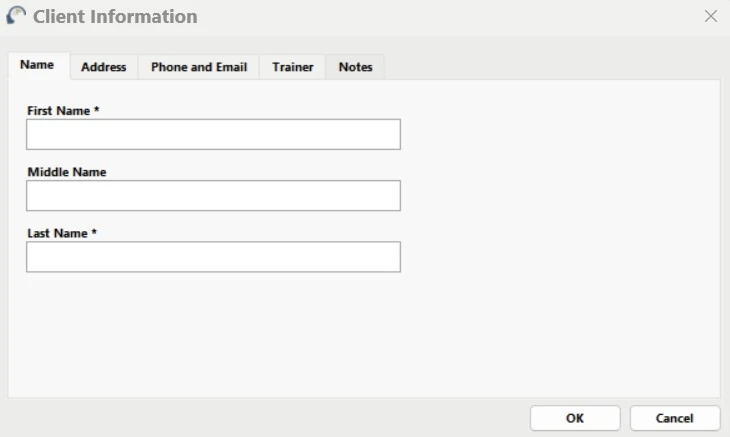
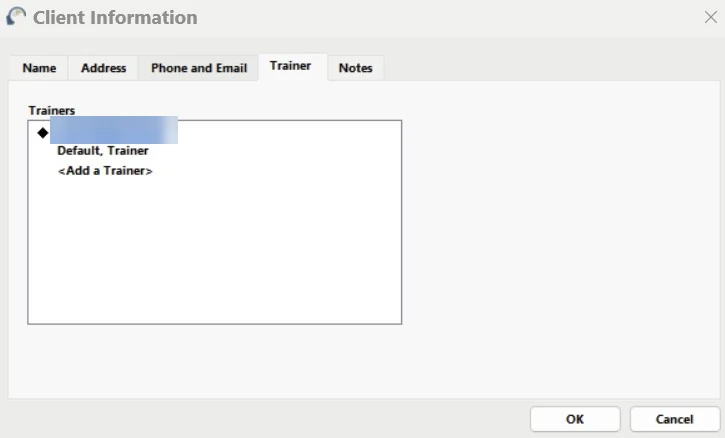
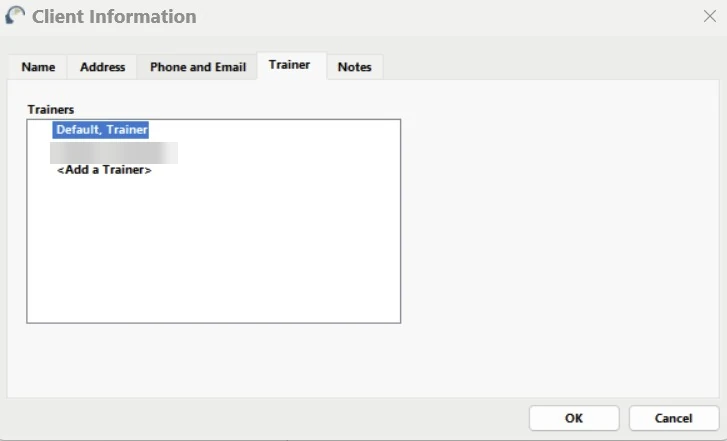
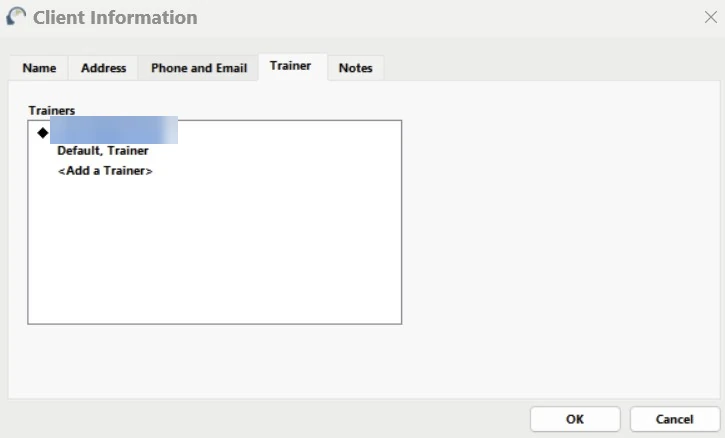
Images and step instructions: NeurOptimal® Getting Started Manual, © Zengar Institute Inc. All rights reserved. Used with acknowledgement. Official version: https://neuroptimal.com/getting-started-manual/ · Official PDF
You will know it has started when the music begins, the zAmp light turns on, the Vault is replaced by the colourful Spectra display, and the timer in the media player window starts counting.
Starting a session (under 1 minute). Official video from NeurOptimal® Neurofeedback (Zengar Institute). Watch on YouTube
During the session
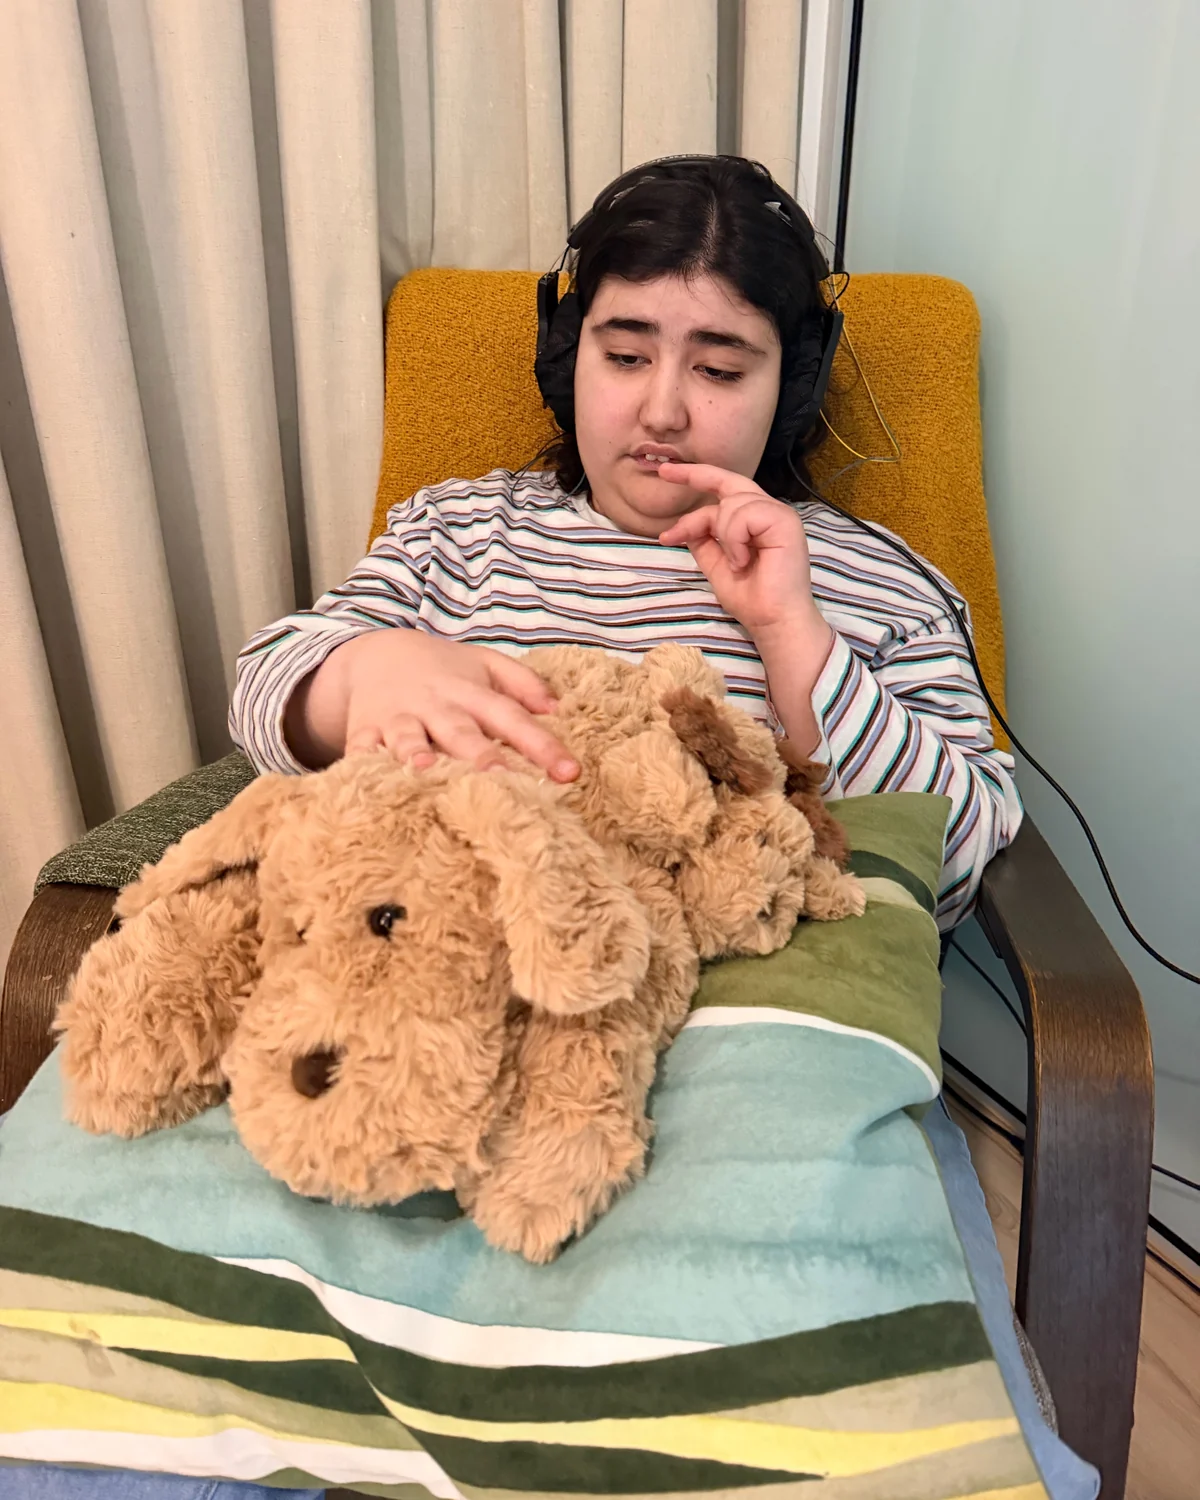
Now there is nothing to do. Sit back and rest. Read, colour, close your eyes or look out the window. Talking is fine too. Please do not eat or drink during the session. You do not need to watch the screen. Every now and then the music pauses briefly. That is the feedback, and there is no need to notice it or try to change it. Allow about an hour in total, including about 33 minutes of music.
Ending and cleaning
- When the music ends, take the sensors off gently, keeping paste away from the hair as best you can.
- Clean the sensors straight away with a damp soft cloth or baby wipe, gently but thoroughly, then dry them well. Please do not use alcohol or chemical cleaners.
- Wipe the ears and hair with a tissue or wipe. Paste comes off easily with water.
- Close the program with the x at the top right, then shut the Surface Pro down or leave it on charge.
- Loosely coil the leads. Please do not kink, braid or wind them tightly.
Have a glass of water and a few quiet minutes. Some people feel calm or sleepy afterwards, and others notice little at first. Experiences vary.
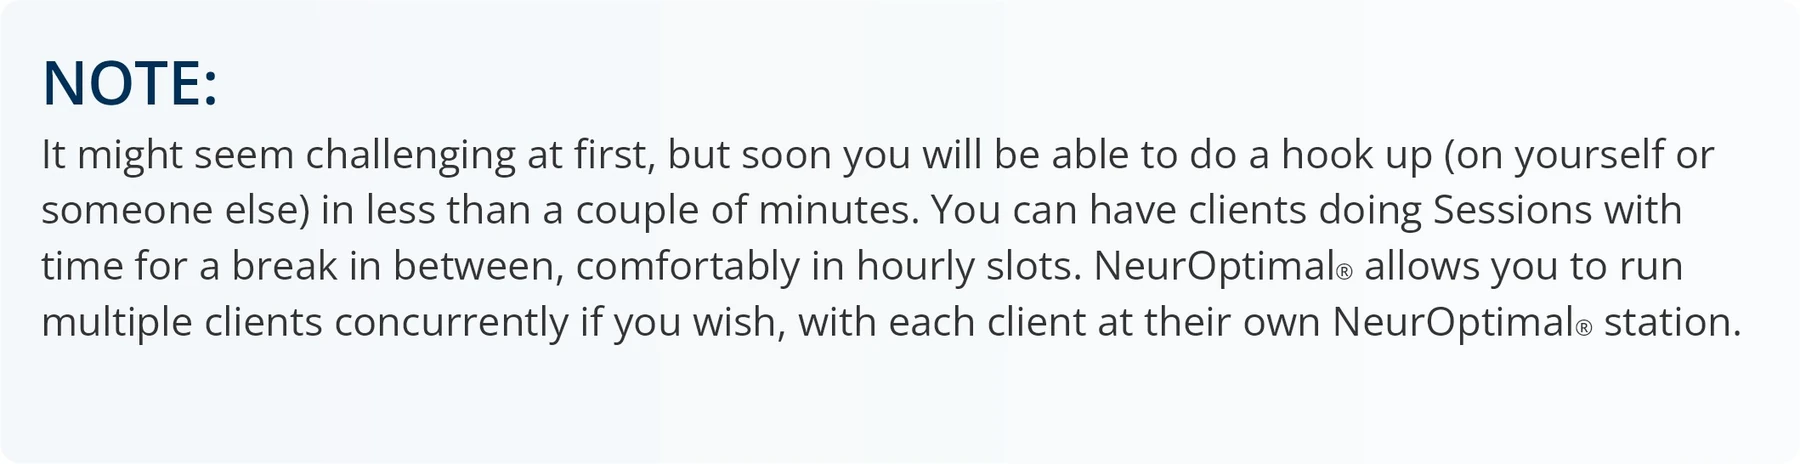
Images and step instructions: NeurOptimal® Getting Started Manual, © Zengar Institute Inc. All rights reserved. Used with acknowledgement. Official version: https://neuroptimal.com/getting-started-manual/ · Official PDF
Official pages: Getting Started Manual (online) · Session cheat sheet (PDF) · Video tutorials
AFTER YOUR SESSIONS
Track your journey with My NeurOptimal® Companion
Track your Sessions and reflect on your experience: a convenient way to observe shifts over time.
- Log your training Sessions manually (dates and personal notes)
- Track changes in how you’re feeling
- Capture reflections and observations
- View monthly summaries
- Build a personalized watchlist
- Use it in 5 languages: English, French, Spanish, Italian, and Dutch
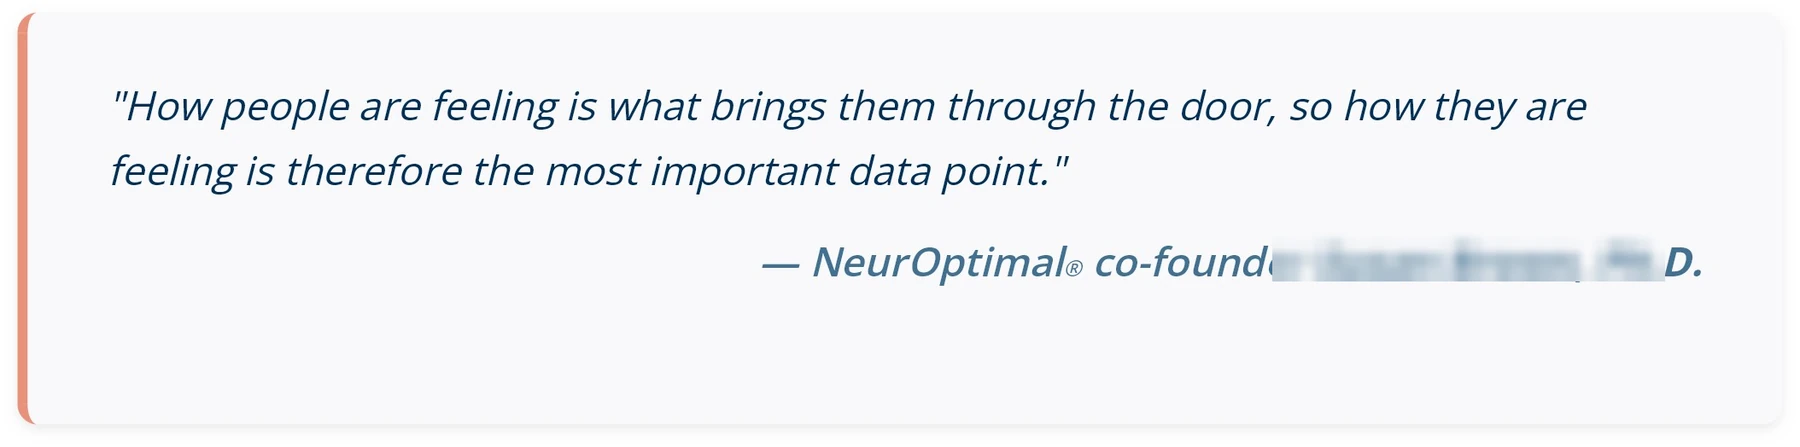
Images and step instructions: NeurOptimal® Getting Started Manual, © Zengar Institute Inc. All rights reserved. Used with acknowledgement. Official version: https://neuroptimal.com/getting-started-manual/ · Official PDF
SENSOR PLACEMENT AT A GLANCE
Where the sensors go
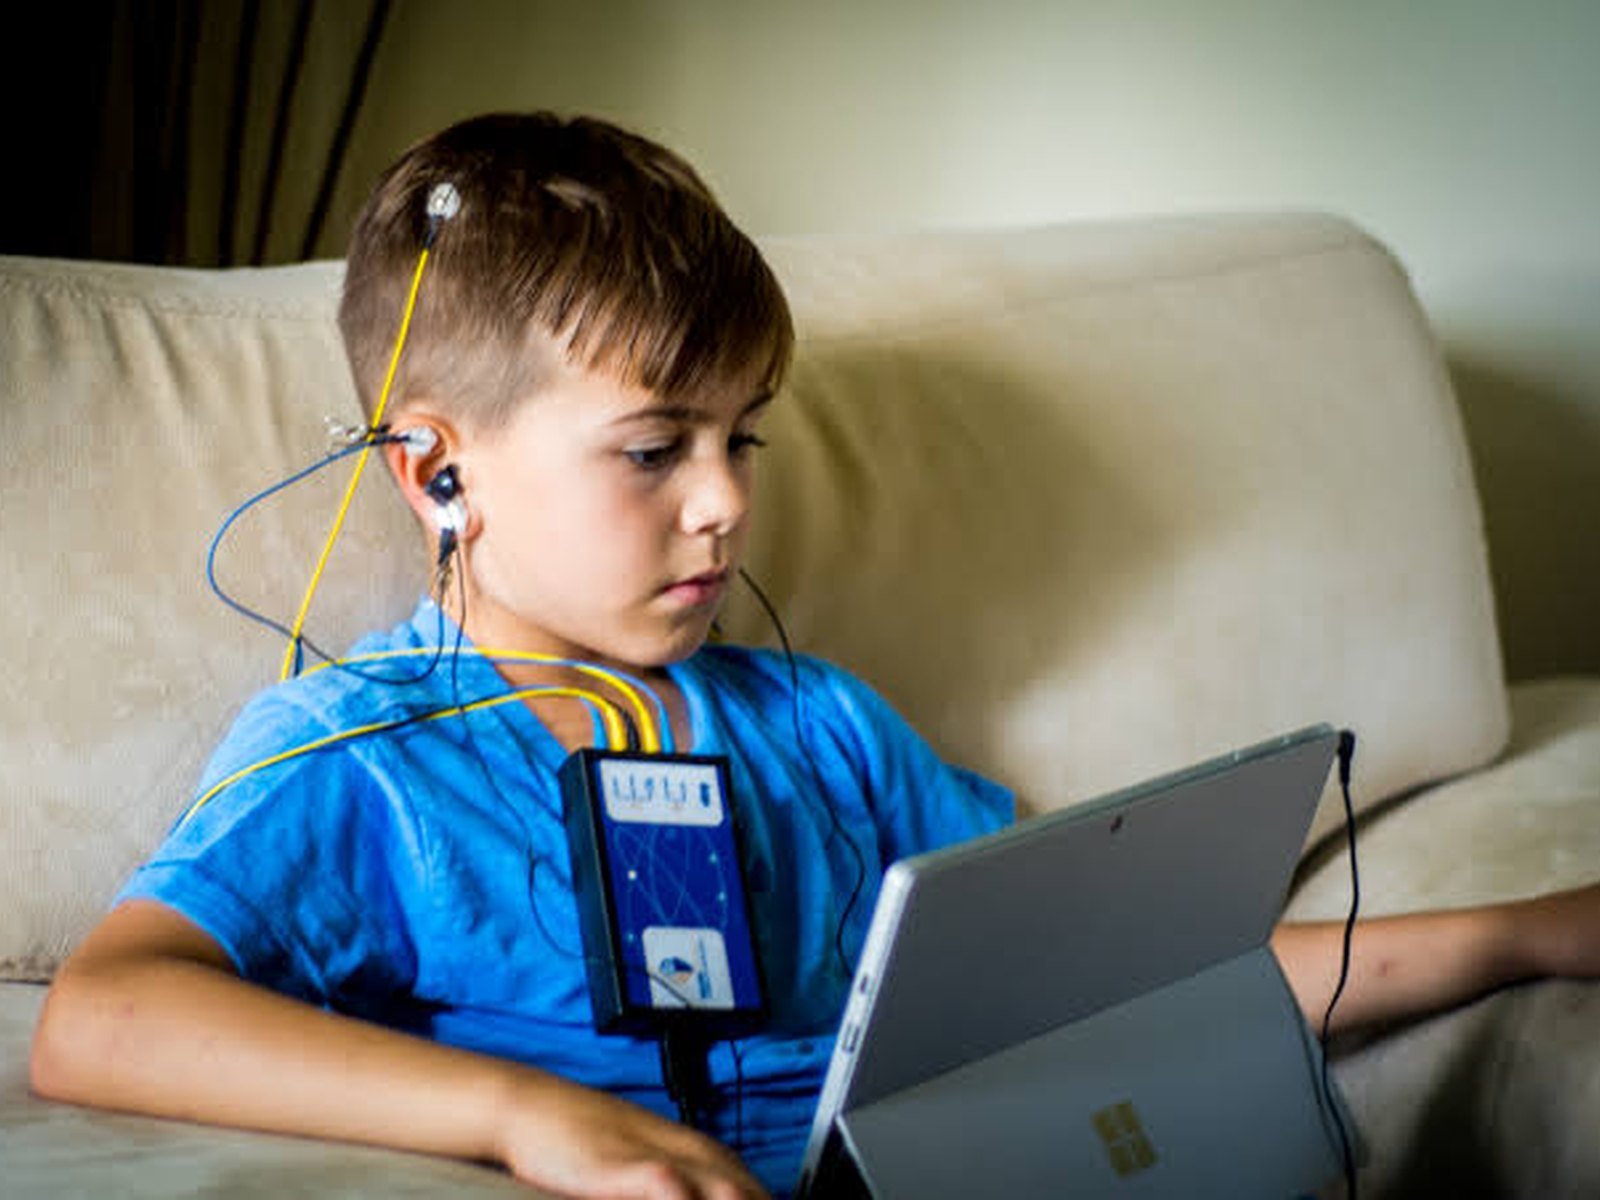
Think of it as five little pieces: a yellow sensor on each side of the head, a blue clip on the top of each ear, and one black clip on the right earlobe.
- Yellow cup: scalp, halfway between ear and top of head (known as C3 on the left and C4 on the right)
- Blue clip: top of each ear
- Black clip: right earlobe only
Right side: three sensors. Left side: two sensors.
TIPS FOR CHILDREN
Making it easy for little ones
- Let them see you go first. Seeing a parent have a session makes it feel safe and ordinary.
- Let them choose a quiet activity. Colouring, drawing, reading, a puzzle or a quiet movie are all fine, as long as they can hear the music.
- Part the hair with a clip. It helps the yellow sensor press on the scalp instead of resting on hair.
- Check now and then. Children move around, so every 10 to 15 minutes gently check the sensors are still pressed on.
- Make it a routine. A regular time each day, with a heads-up beforehand, helps children feel ready.
An adult should stay close for children’s sessions and help with the sensors.
Why it feels gentle for children
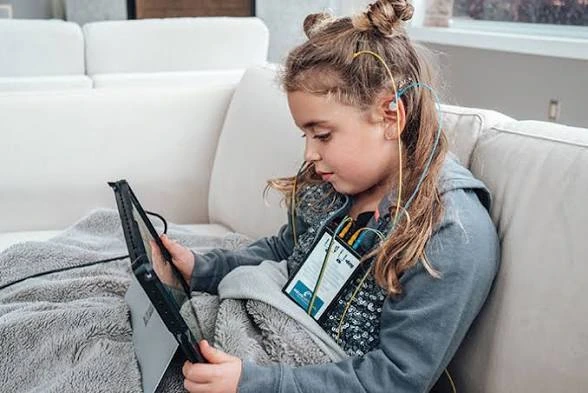
The sensors only listen. Nothing is sent into the brain. The feedback comes through brief pauses in the music, and children do not need to perform or concentrate. They can relax, listen, read or sit comfortably. For children from 4½ years of age and adults alike, NeurOptimal® Neurofeedback is brain training, not a medical treatment.
Official pages: Neurofeedback for kids · Myth busters
LOOKING AFTER YOUR SENSORS
Caring for your sensors
Six small habits help your sensors last and keep the signal clear for every session.
Clean straight away
Clean the sensors immediately after every session. Paste left on can corrode them and shorten their life.
Be gentle, then dry
Use a damp cloth or wipe, gently but thoroughly. Then dry them properly. No alcohol or chemical cleaners.
Support the sensor
When you scoop paste, rest your forefinger on the back of the sensor. This stops it bending or getting damaged.
Look after the wires
Never kink, braid or wind the wires tightly. Good care helps the signal during sessions.
Check them regularly
Look over the sensors now and then. If one is damaged, switch to the backup set in your kit and tell Bita. Please call us or contact us.
A little bend is fine
Sensors are made to bend, so they can drift out of shape over time. That is by design, and you can gently adjust them for a better fit or comfort.
Official pages: Technical Support FAQs · Getting Started Manual (online)
COMMON QUESTIONS
Common questions
Most little hiccups are easy to fix. Here are the ones we hear about most. For anything else, call us or contact us.
There is no sound. What do I check?
The little pauses in the music are how NeurOptimal® Neurofeedback gives feedback, so the sound needs to be on. Turn the volume up with the speaker icon at the bottom right of the screen, check it is not muted, and push the headphones in firmly. Still silent? call us and we will talk you through it.
The screen says it cannot find the amplifier (zAmp), or the connection drops.
This almost always means a cable has come a little loose. Push the USB cable in firmly at both ends, at the zAmp and at the Surface Pro, tap “Try Again”, then press Play. If that does not work, tap “Stop Initialization” and start the session again. Please use only the USB cable that came with your kit. Still stuck? call us.
The software says my licence is not valid, or asks me to go online.
NeurOptimal® Neurofeedback needs to connect to the internet at least once a week to check its licence, and staying connected is best. Join your home Wi-Fi, close the program and open it again. If it still asks, restart the Surface Pro, or call us.
How do I know the sensors are on well?
A good contact feels cool on the scalp, because the paste is touching skin and not hair. If a sensor slips, lift it, part the hair a little more, add a generous scoop of fresh paste and press it down firmly. Being close to the right spot is fine. There is also a quick built-in sensor test, shown in the video below.
How to test your sensors (about 2 minutes). Official video from NeurOptimal® Neurofeedback (Zengar Institute). Watch on YouTube
Do the sensors ever need replacing?
Sensors are designed to be a little bendy, so a bit of bending is normal and you can gently adjust them for comfort. If one looks damaged, or the sensor test shows a problem, swap to the spare set in your kit and let us know.
Can we use Bluetooth headphones?
Wired headphones or earbuds are the most reliable choice. Wireless ones can drop out and interrupt the session.
The music has long pauses in it.
Brief pauses are the feedback and are completely normal. Occasionally a pause is longer, which can happen when the computer is busy. It does not stop the session from working, but if it happens a lot, close the program, restart the Surface Pro and try again, or call us.
What are the sample sessions listed in the Vault?
They are three sample sessions that come built in to every system, used by the software for quality checks. They are normal, and you can ignore them. Their dates do not show how old your kit is.
The Surface Pro wants to update, or something looks different.
Please accept Windows updates when the Surface Pro offers them, and keep it connected to your Wi-Fi so the updates can run. Updates help it keep working well. Please do not install other programs or change settings yourself. If something looks different afterwards, for example the colourful display is missing, call us. Bita may ask you to log in so she can fix it remotely, at no charge.
Someone’s skin looks red or feels sore.
If anyone has skin irritation, please stop the session, take the sensors off gently and rinse the area with water. Please do not put a sensor on skin that is sore or irritated. call us so we can talk it through.
I felt tired after a session. Is that normal?
Some people notice temporary effects, such as tiredness, after the first few sessions. These usually settle after a few sessions. If they do not, or you are worried, please call us.
My child will not sit still for the whole session.
That is very common. Children can read, draw, colour, do a puzzle or watch a quiet movie while the session runs, as long as they can hear the music. Stay close for the first few sessions and check the sensors are still pressed on every 10 to 15 minutes. If it is still hard, contact us and Bita will help you find a routine that suits your child.
How is {NO} different from other neurofeedback?
Many neurofeedback approaches begin with assessments, and a practitioner then chooses which brain patterns to encourage. NeurOptimal® Neurofeedback works differently. It is automatic. It listens to your brain’s activity and reflects it back through tiny pauses in the music, so the brain can adjust itself, without anyone choosing protocols for you. That is why it can be run simply at home. It is brain training, not a medical treatment. If you would like to know more, the makers explain the differences on their own page.
Official pages: NeurOptimal® vs other neurofeedback
How many sessions can we do?
Up to 2 sessions per person, per day, and everyone in your household can use the system. Sessions are for children and adults from 4½ years of age.
Official pages: Technical Support FAQs · Tech tips · Self-help guide (PDF)
LOOKING AFTER THE KIT
Caring for the rest of your kit
- The Surface Pro: please do not install any programs or change its settings. Only Zengar’s technical staff should make changes. Please do not eat or drink near it during a session.
- Windows updates: please accept them when the Surface Pro offers them, and keep it connected to Wi-Fi so they can run.
- Charging: keep it on charge when it is not in use.
- The paste: please use the Ten20 paste in your kit. Wipe off any paste around the tub before closing it.
- The carry case: keep everything together in the hard case, ready for the return trip.
Technical problem? call us, Monday to Friday during business hours. Bita may ask you to log in so she can help remotely, at no charge.
Official pages: Technical Support FAQs · Getting Started Manual (online)
RETURNING THE KIT
Sending the kit back
We send the kit to you by Express Post at our cost. When you are finished, you return it by Express Post at your own cost.
- Pack everything in the same packaging it came in. Your return postage envelope is inside the black case.
- Take it to an Australia Post outlet and hand it to a staff member. Please do not drop it in a post box.
- Send us the tracking number and a photo of the packed kit.
- Bita will give you the return address when your rental starts.
If you have booked a month, an extension depends on availability. If you have any questions about returning the kit, contact us.
Mental Health OT Australia
Need help? 0406 107 775
We are here for you. If anything is unclear, or you would just like to hear a friendly voice while you put the sensors on, please call us or contact us. Thinking of a longer rental, or have questions before you start? You are welcome to book a discovery call. About 48 hours after your first session, Bita, our senior occupational therapist, will check in to see how it went and answer your questions. For technical help, call Bita on 0406 107 775, Monday to Friday during business hours.
Led by Bita, senior occupational therapist · Wembley, Perth · Home rental Australia-wide
PRINTABLE · KEEP BY THE CHAIR
Quick-start checklist
Setting up your NeurOptimal® Neurofeedback at home
Before you begin
- Kit unpacked and checked; Surface Pro charged
- Quiet, comfortable seat; tissues or baby wipes, paste and your own headphones within reach
- Wi-Fi name and password ready (first time)
Set up
- zAmp clipped to a towel or the back of your shirt; USB cable into the Surface Pro
- Coloured leads into matching colours on the zAmp (right side: three; left side: two)
- Headphones in; Surface Pro on; Wi-Fi connected; open NeurOptimal® Neurofeedback
Sensors (paste first, a generous scoop on each)
- Right ear: blue clip on top of the ear; black clip on the earlobe
- Right scalp: yellow cup halfway between ear and top of head; hair parted; press until cool
- Left ear: blue clip on top of the ear
- Left scalp: yellow cup in the matching spot
Session
- Sound on; double-tap the client’s name to start
- Music begins, zAmp light on, timer running. Rest, read or colour. No eating or drinking
Afterwards
- Sensors off; cleaned straight away with a damp cloth or baby wipe, then dried
- Close the program; charger in; leads coiled loosely
Need help? Call us on 0406 107 775 or contact us. Up to 2 sessions per person, per day. Bita will check in about 48 hours after your first session.
CREDITS
Images and step instructions: NeurOptimal® Getting Started Manual, © Zengar Institute Inc. All rights reserved. Used with acknowledgement. Official version: https://neuroptimal.com/getting-started-manual/
Official PDF: Getting Started manual (PDF)
The photos and screens in this guide come from the manual, with its captions and step wording, and belong to Zengar Institute Inc. A few on-screen sample names and one phone number in the images have been blurred. NeurOptimal® Neurofeedback is a registered trademark of Zengar Institute Inc.
NeurOptimal® Neurofeedback is brain training, not a medical treatment. It does not diagnose, treat, prevent or cure any medical or psychological condition, and individual experiences vary. It is not a substitute for advice or care from your GP or another qualified health professional. If anyone feels unwell or uncomfortable during a session, stop and take the sensors off. If you need urgent support, call Lifeline on 13 11 14, or 000 in an emergency. NeurOptimal® and Dynamical Neurofeedback® are registered trademarks of Zengar Institute Inc. Mental Health OT Australia does not promise NDIS or other funding for neurofeedback or device rental.